Few topics hold a young child’s attention like dinosaurs. These dinosaur coloring pages turn that enthusiasm into calm, hands-on practice with fine motor control, careful looking, and new vocabulary.
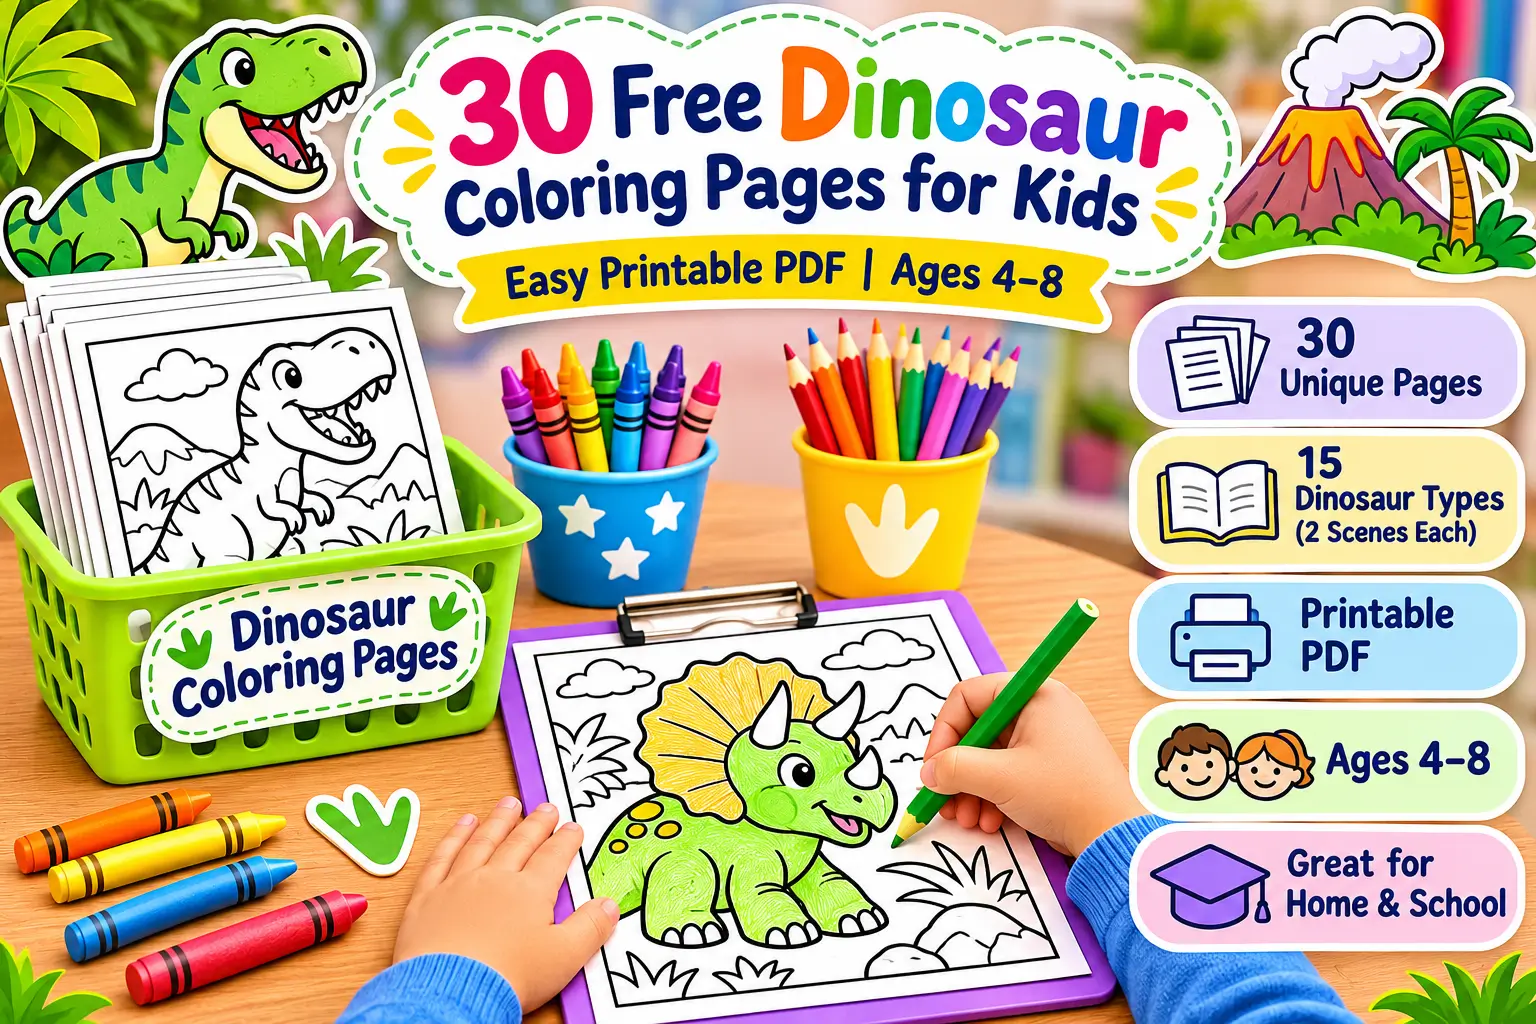
This free printable pack gives parents, preschool teachers, and kindergarten teachers 30 unique black-and-white dinosaur illustrations featuring 15 different dinosaur types, with two original scenes for each type.
It also includes a short instruction page, an identification guide, and a hand-colored-style example page, so you can plan the activity without hunting for extra materials.
Below you’ll find what’s in the pack, a closer look at the dinosaurs children will meet, three different ways to color, learning extensions, classroom station ideas, printing tips, and answers to common questions.
What’s Included in the Free Dinosaur Coloring Pages PDF
The printable is a single PDF titled “30 Free Dinosaur Coloring Pages for Kids – Easy Printable PDF.” It contains exactly 33 pages:
- 30 unique black-and-white dinosaur coloring illustrations (pages 3–32). The pack features 15 different dinosaur types, with two distinct coloring scenes for each.
- 1 teacher/parent instruction page (page 1). It gives quick guidance for setting up the activity.
- 1 dinosaur identification guide (page 2). This is a separate reference page children can use to match names with dinosaurs.
- 1 hand-colored-style example page (page 33). It shows a colorful Baby Triceratops using the same original line art as the coloring page on page 4, so children can compare it with the blank version.
The 30 illustrations feature well-known dinosaurs, including Tyrannosaurus rex, Triceratops, Stegosaurus, Brachiosaurus, Apatosaurus, Diplodocus, Ankylosaurus, Parasaurolophus, Spinosaurus, Velociraptor, Iguanodon, Pachycephalosaurus, Styracosaurus, Allosaurus, and Carnotaurus.
The pages are built around prehistoric themes: forests, ferns, rocky landscapes, rivers, herds, dinosaur families, and footprints.
Some pages focus on the animal itself, while others place it in a setting with plants, water, or tracks to color.
Every animal in the set is a true dinosaur. Pterosaurs (flying reptiles) and marine reptiles such as plesiosaurs are often mixed in with dinosaurs in children’s books and toys, but they belong to different groups, so they’re not part of this pack.
If your child asks about them, that’s a nice opportunity to talk about how scientists sort ancient animals into groups.
Skill Level and Materials
These pages are designed primarily for children ages 4–8, including preschoolers, kindergarteners, and early elementary students. Younger children can also enjoy simpler scenes with appropriate adult assistance.
You can adjust the challenge up or down (see the three coloring approaches below).
You’ll need:
- Printer and standard letter-size paper (cardstock is optional for pages you want to display)
- Crayons, colored pencils, washable markers, or a mix
- A pencil case, tray, or cup for each child so supplies stay organized
- A clipboard or hard surface if children will color on the floor
- A folder or binder for finished pages
Meet the Dinosaurs: What Makes Each One Recognizable
One of the quiet strengths of dinosaur coloring is that it asks children to look closely at shape.
Each dinosaur has a few features that make it easy to recognize, and noticing them is early practice in observing, comparing, and describing.
Here are the distinguishing details for the 15 dinosaur types included in the printable pack, along with their exact coloring page numbers.
The descriptions are based on general dinosaur characteristics, while the illustrations use simplified, child-friendly designs.

Tyrannosaurus rex — Pages 3 and 18
This large meat-eating dinosaur walked on two powerful legs and had a big head with strong jaws.
Its arms were very short compared with the rest of its body. Children love the tiny arms, and they’re a great spotting clue.
Triceratops — Pages 4 and 19
The name means “three-horned face,” which helps children remember its look: two long brow horns, one shorter horn over the nose, and a wide bony frill behind the head.
It walked on four legs and ate plants.
The Baby Triceratops on page 4 is also the design used for the colored example on page 33.
Stegosaurus — Pages 5 and 20
Look for the row of large upright plates along the back and the spikes at the end of the tail.
Its head was small compared with its body, and it also ate plants.
Brachiosaurus — Pages 6 and 21
This is a classic long-necked giant.
Its front legs were longer than its back legs, so its body sloped upward toward the shoulders and neck.
It browsed on plants high off the ground.
Apatosaurus and Diplodocus
Apatosaurus — Pages 7 and 22
Diplodocus — Pages 8 and 23
Both are long-necked, plant-eating sauropods with long tails, so they’re easy to confuse.
A friendly way to tell them apart in conversation is to talk about how Diplodocus is often pictured as especially long and slender, while Apatosaurus is often pictured as more heavily built.
Don’t worry if younger children just call them both “long-necks.” That’s a perfectly good starting point.
Ankylosaurus — Pages 9 and 24
Think “armored tank.”
Its back was covered in bony plates, and it had a heavy club at the end of its tail.
It was low to the ground and ate plants.
Parasaurolophus — Pages 10 and 25
The giveaway is the long, curved, hollow crest sweeping back from the head.
It was a plant-eating dinosaur with a duck-like bill.
Scientists have studied what the crest may have been used for, and it’s a fun place to ask children what they think.
Spinosaurus — Pages 11 and 26
Its tall sail along the back and long, narrow snout make it distinctive.
Scientists continue to study how it lived, including how much time it spent in or near water, so it’s a good example of how our understanding of dinosaurs keeps changing.
Velociraptor — Pages 12 and 27
Far smaller than movies suggest, this was a light, quick, meat-eating dinosaur with a curved claw on each foot.
Fossil evidence indicates that Velociraptor had feathers, which makes it a nice example for talking about how dinosaur pictures change as scientists learn more.
The Velociraptor illustrations in this printable also include feather details.
Iguanodon — Pages 13 and 28
Look for the large thumb spikes.
It was a plant eater that could stand on two legs or walk on four.
Pachycephalosaurus — Pages 14 and 29
The name roughly means “thick-headed lizard,” and the thick, domed skull is the main clue.
It walked on two legs and was a plant eater.
Styracosaurus — Pages 15 and 30
Like Triceratops, it was a horned dinosaur with a frill, but the frill was edged with long spikes, and it had a prominent horn on the nose.
Putting the two side by side makes a great comparison activity.
Allosaurus — Pages 16 and 31
Allosaurus was a large meat-eating dinosaur that walked on two powerful legs.
It had a big head, three-fingered hands, and distinctive bony ridges above its eyes.
Children can compare Allosaurus with Tyrannosaurus rex and look for differences in their arms, hands, and heads.
Carnotaurus — Pages 17 and 32
Carnotaurus was a meat-eating dinosaur recognized by two horns above its eyes and extremely small arms.
Its unusual head shape makes it easy to identify.
Ask children to compare the horns of Carnotaurus with those of Triceratops and Styracosaurus.
They can observe how horns appeared in different positions on different dinosaurs.
You don’t need to teach all 15 types at once. Pick two or three each session and let the rest wait.
For more information about dinosaur species and their distinguishing features, explore the Natural History Museum’s Dino Directory, a useful reference for parents and teachers.
Three Ways to Color: Matching the Task to the Child
The same page can be a quick, relaxed activity for a younger child and a longer project for a second grader.
These three approaches help you choose.
1. Easy Coloring: Big Shapes, Big Movements
This approach is for young preschoolers and anyone beginning to develop coloring control, with adult support when needed.
- Goal: Enjoy coloring and practice holding a crayon.
- Tools: Age-appropriate chunky crayons or washable markers.
- How it works: Offer two or three crayons and invite the child to fill in the dinosaur however they like. Scribbling counts. Encourage them to color the large body parts first.
- Talk about it: “Which dinosaur did you pick?” and “What is it doing?” keep the focus on enjoyment and language rather than staying inside the lines.
Choose pages with large, simple shapes for this approach, and give children permission to finish when they’re ready.
2. Guided Coloring: One Detail at a Time
This works well for preschoolers and kindergarteners ready for a little more focus.
- Goal: Practice noticing details and following simple directions.
- Tools: Crayons or colored pencils.
- How it works: Give one instruction at a time. “Let’s color the horns first.” “Now the ground.” “Now the ferns.” Pause between steps so children can look at the page.
- Talk about it: Use the descriptive words from the dinosaur section, such as frill, plates, crest, club, and sail, as you go.
This version supports listening skills, and it fits well in small groups where an adult can call out each step.
3. Detailed Coloring: Patterns, Shading, and Backgrounds
This is for older kindergarteners and early elementary children who like a challenge.
- Goal: Build stamina, control, and creative decision-making.
- Tools: Colored pencils, fine-tip markers, or a mix.
- How it works: Encourage patterns on skin and plates, light and dark shading, and full backgrounds with plants, rocks, and water. Children can plan a color scheme first.
- Talk about it: Ask about choices. “Why did you color the river that way?” invites children to explain their thinking.
Pages with scenery are especially good here because the background gives children more to work with.

Fact vs. Imagination: Coloring Extinct Animals
Coloring dinosaurs raises a question children often ask: “What color was it really?”
The answer is a good lesson in itself.
Scientists don’t know the exact colors of most dinosaur species. Fossils usually preserve bones, and only in rare cases do they preserve evidence that gives clues about coloration.
So there isn’t a single known color scheme for most dinosaurs, including Triceratops or Stegosaurus.
That’s wonderful news for coloring time.
You can tell children something like:
“Scientists have clues about how dinosaurs looked, like their shapes, horns, and plates. But we don’t know exactly what colors most dinosaurs had, so you get to imagine.”
This separates what we know (body shape and features) from what we’re guessing (colors), which is a gentle introduction to scientific thinking.
The hand-colored Baby Triceratops example on page 33 is a helpful reference here.
It uses the same original design as the black-and-white coloring page on page 4.
Present it as one example of how a page can be colored, not as the “right” answer.
Children can compare it with their own work and notice that their choices are different and equally valid.
If you’d like to add an extra layer, ask older children to explain their color choices.
A child who colors a dinosaur green and brown “so it can hide in the ferns” is using reasoning about camouflage, even if it’s a guess.
A child who colors it purple with stripes “because it’s my favorite” is using imagination.
Both are welcome.
Learning Ideas to Go with Your Dinosaur Coloring Pages
Coloring works best when it’s connected to a little conversation, comparison, or play.
Try these.
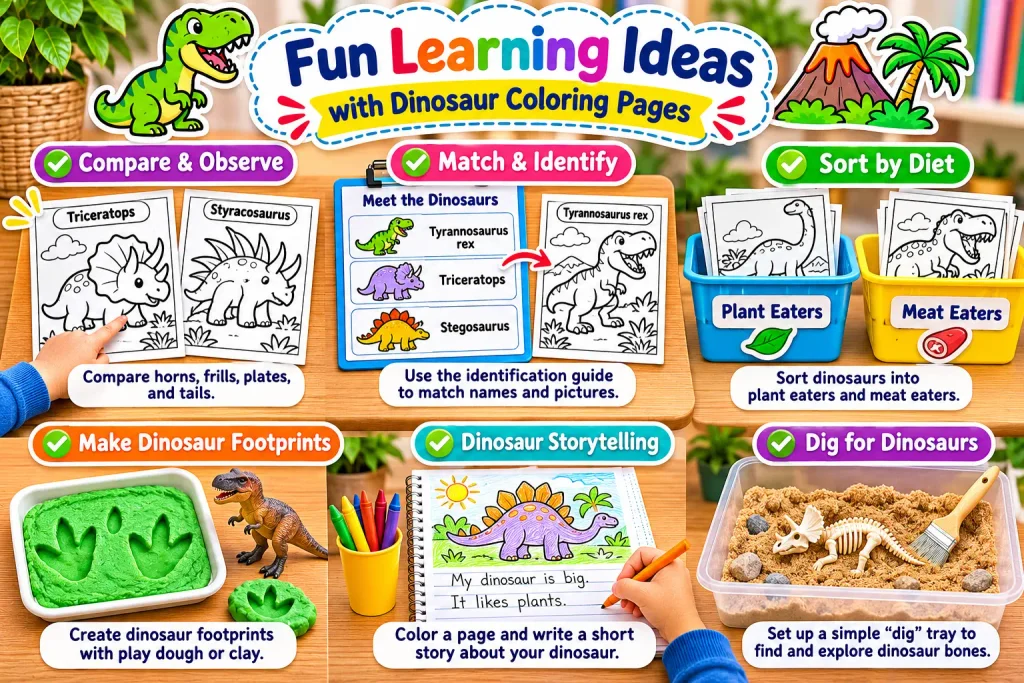
Compare Plates, Horns, and Tails
Pick two dinosaurs and ask children to look for what’s different.
Triceratops and Styracosaurus both have frills and horns, but the details differ.
Stegosaurus and Ankylosaurus both have defenses on their back and tail, but the shapes aren’t the same.
Ask, “Which one has a club? Which has spikes? Which has plates?”
Children can point, describe, or draw circles around the features.
Match Names to Dinosaurs
Use the separate dinosaur identification guide on page 2 as a reference.
Children can look at a finished page and find the matching dinosaur on the guide, or choose a dinosaur from the guide and find its page.
Younger children can match by picture, while older children can read or sound out the names.
Keep it light. Mispronouncing “Parasaurolophus” is practically a rite of passage.
Playful Storytelling
Ask children to tell a short story about their page.
“Where is the dinosaur going?” “Who is it meeting?” “What does it eat?”
Pages with herds, families, rivers, and forests give plenty to talk about.
For writing practice, older children can dictate or write one or two sentences beneath the picture.
Sort by Diet and Size
After coloring, have children sort their pages into piles: plant eaters and meat eaters, or bigger and smaller.
Use the identification guide as a starting point, and note that some dinosaurs in the pack are plant eaters and some are meat eaters.
Simple Fossil and Footprint Extensions
Because the pack includes footprint themes, you can build a few easy extensions:
- Footprint hunt: After coloring a footprint page, hide paper footprints around the room and let children follow the trail.
- Salt dough or clay prints: Press a toy dinosaur’s foot into clay or play dough to see the impression it leaves. Adult supervision is helpful with younger children, and keep dough away from mouths.
- “Dig” tray: Bury small toy dinosaurs or craft pieces in a tray of sand or rice and let children brush them out gently, like paleontologists.
These are simple play ideas, not formal science lessons, and they pair well with the coloring pages without requiring special equipment.
Dinosaur Learning Stations for the Classroom
Dinosaur coloring pages work well as one station in a rotation.
Here’s a sample setup for a preschool or kindergarten room, using only common supplies.
- Coloring station. Provide printed pages, a tray of crayons, and a card showing the three coloring approaches so children can choose easy, guided, or detailed. Place the example page nearby.
- Identification station. Put out the dinosaur identification guide and a few finished pages. Children match pictures to names.
- Footprint station. Offer play dough and toy dinosaurs for making prints.
- Story station. Provide blank paper and pencils so children can draw or write a short dinosaur story. Or offer a small basket of dinosaur picture books from your library.
- Dig station. A tray of sand with hidden toy dinosaurs and soft brushes.
Rotate groups every 10 to 15 minutes, depending on your class.
If you have only a few minutes, run the coloring station alone and use the identification guide as a quick follow-up at circle time.
At home, a simple version works: one parent, one table, a stack of pages, and a dinosaur book from the library.
A rainy afternoon is enough.
How to Set Up the Printable
Printing Tips
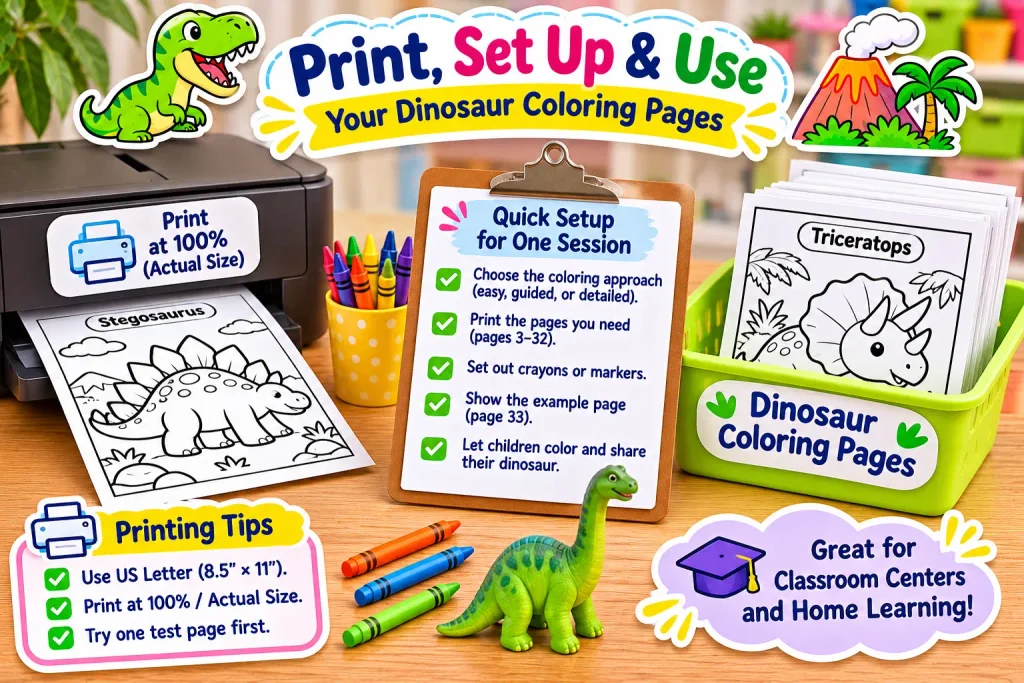
- Print the full 33-page PDF, or choose only the pages you need. You don’t have to print everything at once.
- Use standard US Letter paper (8.5 × 11 inches) and select 100% / Actual Size in your printer settings, as recommended in the PDF. Print one test page first to check that the margins and illustrations are not cut off.
- The 30 dinosaur coloring pages are located on pages 3–32. You can print only the dinosaurs you need for a particular lesson.
- Black-and-white printing is fine for the coloring pages. Use draft mode to save ink, but check that lines stay dark enough for children to see.
- If you plan to use markers, consider heavier paper or cardstock to reduce bleed-through. Place a spare sheet underneath.
- Print the instruction page (page 1) and identification guide (page 2) on regular paper. If you want to reuse the guide, laminate it or slip it into a sheet protector.
- The colored Baby Triceratops example is on page 33. Print it in color only if you want a physical reference, or simply display it on a screen.
Storage and Reuse
- Keep unused pages in a folder or binder so they stay flat.
- Children can store finished pages in a “dinosaur book” with a construction-paper cover and a simple stapled or hole-punched binding.
- For classroom reuse, print several copies of your favorite pages and keep a master set in a binder.
- Since the PDF is free, you can print it again whenever you need more.
Step-by-Step Setup for One Session
- Decide the approach (easy, guided, or detailed) and choose matching pages.
- Print a few more pages than you have children, in case of mistakes or requests for a second page.
- Set out supplies in advance, in trays or cups.
- Show the Baby Triceratops example on page 33 briefly and explain that its colors are imaginative choices.
- Let children choose their page and begin.
- Offer talk prompts while they work. Keep them brief.
- At the end, invite children to share one thing about their dinosaur.
Common Mistakes to Avoid
- Printing everything at once. Thirty pages is a lot for one child. Offer a few at a time.
- Insisting on “correct” colors. Since exact colors are unknown for most dinosaur species, avoid saying a color is wrong.
- Over-correcting. For young children, the process matters more than the result. Skip comments on staying inside the lines.
- Skipping the conversation. A few questions turn coloring into language practice.
- Choosing pages that are too detailed for the child. If a page frustrates, switch to a simpler one.
- Forgetting the identification guide. It’s easy to overlook, but it’s the tool that connects coloring with vocabulary.
Frequently Asked Questions
What ages are these dinosaur coloring pages best for?
They’re designed primarily for ages 4–8, including preschool, kindergarten, and early elementary children.
Younger children can use the easy approach with adult help and chunky crayons, while older children can try detailed coloring with patterns, shading, and backgrounds.
The same pack serves a mixed-age group since children can choose how much detail to add.
How many pages are in the free PDF?
The PDF has exactly 33 pages:
- 30 unique black-and-white dinosaur coloring illustrations
- 1 teacher/parent instruction page
- 1 dinosaur identification guide
- 1 colored-pencil-style example page
The coloring pages feature 15 different dinosaur types, with two unique scenes for each type.
Which dinosaurs are included?
The pack includes 15 dinosaur types:
Tyrannosaurus rex, Triceratops, Stegosaurus, Brachiosaurus, Apatosaurus, Diplodocus, Ankylosaurus, Parasaurolophus, Spinosaurus, Velociraptor, Iguanodon, Pachycephalosaurus, Styracosaurus, Allosaurus, and Carnotaurus.
All of them are true dinosaurs, so pterosaurs and marine reptiles are not included.
What color is each dinosaur supposed to be?
Scientists don’t know the exact colors of most dinosaur species, so there’s no single correct answer for the coloring pages.
Children can choose any colors they like.
The colored Baby Triceratops on page 33 shows one possibility, not a rule.
Can I use these pages in my classroom?
Yes. They’re intended as a free educational resource for parents and teachers.
They work as a center activity, a quiet-time task, a morning welcome activity, or a follow-up to a dinosaur read-aloud.
Please follow any usage terms listed on the download page when sharing or distributing.
How do I make the pages easier or harder?
For easier use, choose pages with large shapes, offer fewer crayons, and let children scribble.
For a bigger challenge, choose scenic pages, ask for patterns and shading, and encourage full backgrounds.
You can also add a small writing task, such as one sentence about the dinosaur.
What is the identification guide for?
It’s a separate reference page on page 2 of the PDF.
Children can use it to match dinosaur names with pictures, and adults can use it to prompt conversation about features such as horns, plates, crests, and tails.
The guide includes all 15 dinosaur types and the corresponding coloring page numbers.
Do I need special supplies?
No. Crayons, colored pencils, or washable markers are enough.
A printer and standard paper are all that’s required, and cardstock is optional.
Start Coloring: Your Free Dinosaur Coloring Pages
Dinosaur coloring pages are an easy way to combine creativity, fine motor practice, and early science vocabulary in one calm activity.
With 30 unique illustrations featuring 15 dinosaur types, an identification guide, an instruction page, and a colored Baby Triceratops example, this free pack gives you what you need to plan a quiet afternoon at home or a full set of classroom stations.
Start with a few pages, choose the coloring approach that fits your child, and let the conversation about plates, horns, crests, and tails grow naturally.
Looking for more? Browse our full collection of coloring pages for more free printable fun.