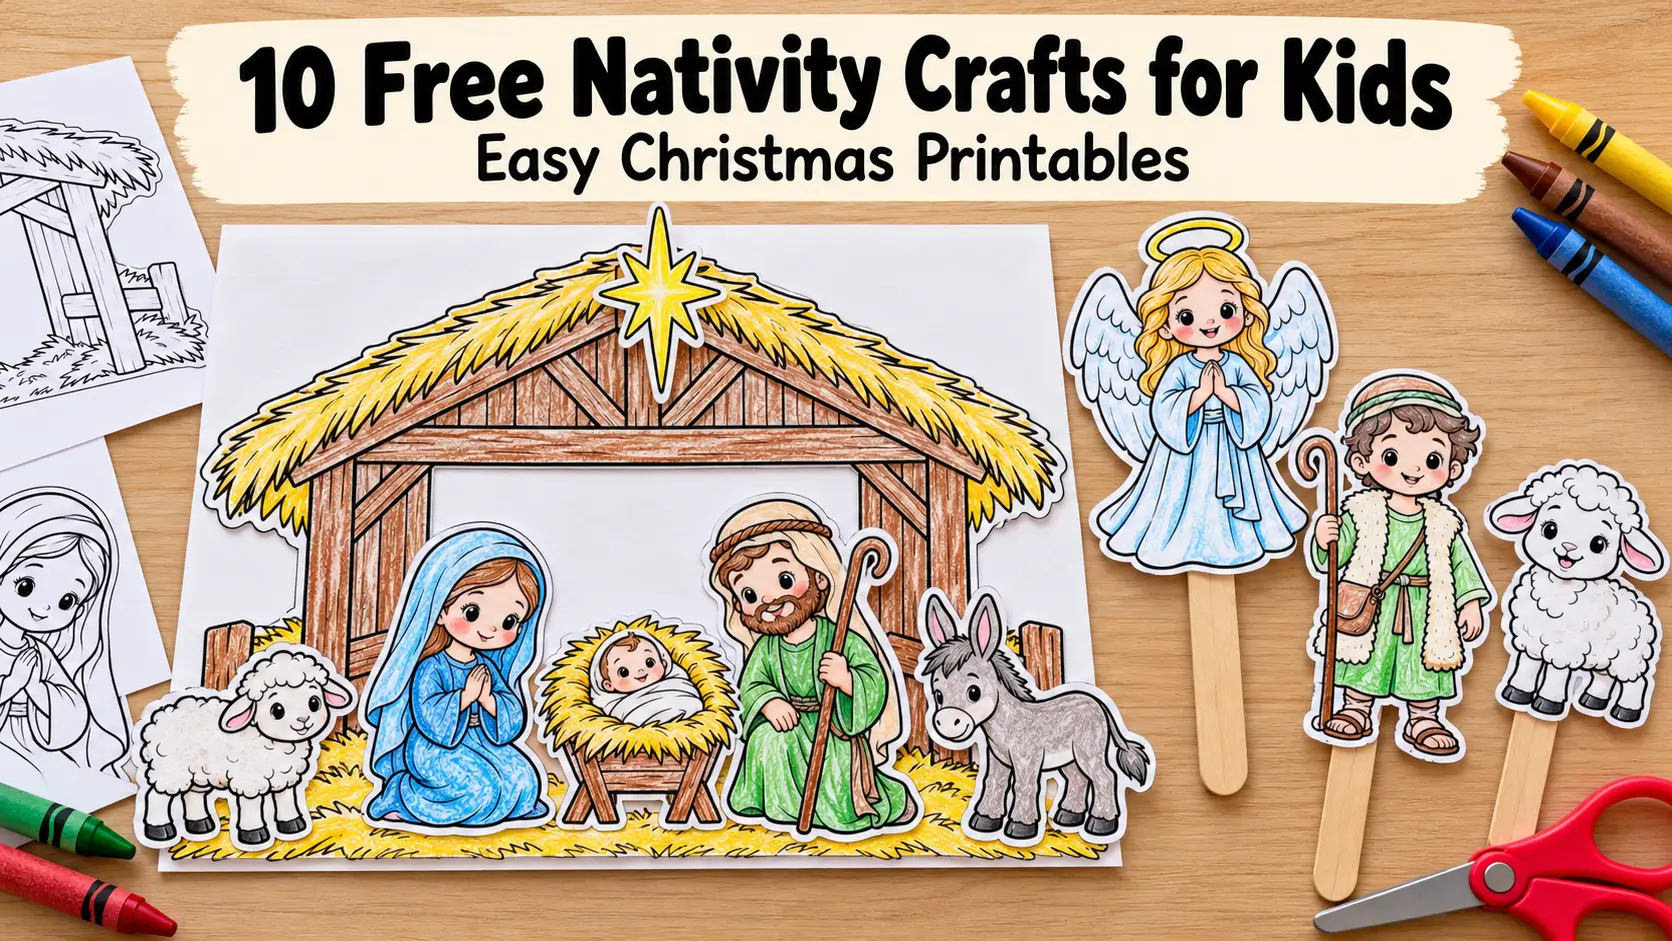
A few crayons, a sheet of paper, and a Christmas story can turn an ordinary afternoon into a creative family activity. These nativity crafts for kids give children something to color, assemble, and use as they learn about Jesus’ birth.
I created this free printable pack under my SmartPrint Kids name for parents and educators who want practical Christmas activities with clear starting points. The collection includes a paper Nativity scene, puppets, an angel, a hanging star, a headband, a manger craft, a story wheel, a lantern, and a garland.
Table of Contents
Choose one project for a quiet afternoon or spread several activities across December. Children can make their own color choices, help arrange the pieces, and use their finished work to describe a moment from the Christmas story.
Download the free Nativity crafts pack from SmartPrint Kids on Teachers Pay Teachers. You may need to sign in to download the PDF.
What Is Included in These Free Printable Nativity Crafts?
The pack contains 10 different craft activity pages, numbered 1/10 through 10/10. Each page includes black-and-white artwork for children to color and a short set of printed directions.
The templates use US Letter portrait paper, 8.5 × 11 inches. This is a digital download; you provide the paper, coloring supplies, and assembly materials.
The PDF also includes two Explore More pages. Those are additional resource pages, so there are ten craft activities in the collection.
These nativity crafts for kids offer different ways to participate. Some children will enjoy arranging a stable scene, while others may prefer turning a story wheel or making puppets talk.
For younger children, prepare the more difficult cuts and let them concentrate on coloring, choosing positions, and pressing pieces into place.
Which Nativity Craft Should You Choose?
Pick a project based on the supplies you have and how much help the children will need.
| Craft | What children make | Additional supplies |
|---|---|---|
| Build the Nativity | A flat stable scene with separate figures | Glue |
| Nativity Stick Puppets | Six characters attached to handles | Craft sticks and tape |
| Angel of Joy | An angel with separate wings and decorations | Glue |
| Follow the Star | A hanging star with three character medallions | Hole punch and string |
| Nativity Headband | A wearable paper band | Glue; optional tape |
| Baby Jesus in the Manger | A layered paper manger scene | Glue; optional backing sheet |
| Nativity Story Wheel | A rotating picture wheel | Paper brad |
| Little Bethlehem Lantern | A standing four-sided paper decoration | Glue |
| Nativity Finger Puppets | Five characters with paper finger bands | Tape |
| Christmas Story Garland | Five illustrated pennants on a string | Hole punch and string |
If you want an easy starting point, choose Build the Nativity or Baby Jesus in the Manger. For children who enjoy storytelling, try the stick puppets, finger puppets, or story wheel.
How to Prepare Your Nativity Crafts for Kids
A little preparation helps children spend more time creating and less time waiting for supplies.
Print the Activity You Plan to Use
Select the numbered craft page you need and print a test copy on US Letter portrait paper. Check the preview for clipped edges and keep the original proportions.
Ordinary printer paper works for many projects. Printer-compatible lightweight cardstock can give puppets, headbands, and the story wheel extra support.
Choose paper that children can still cut and that adults can fold comfortably.
Color Before Cutting
Coloring is usually easier while the pieces are still attached to the sheet. Children can turn the page without trying to hold a small character or decoration.
Crayons and colored pencils are useful choices. If you use markers, test them on your paper first.
Prepare the Adult Steps
For nativity crafts for preschoolers, adults can cut detailed outlines, punch holes, prepare string, and assemble the story wheel’s fastener.
Keep small pieces together in a tray or envelope. For a group, label each child’s container before starting.
Manage scissors, loose string, and small fasteners according to the children’s ages. Let glued projects dry before children wear, lift, or hang them.
1. Build the Nativity
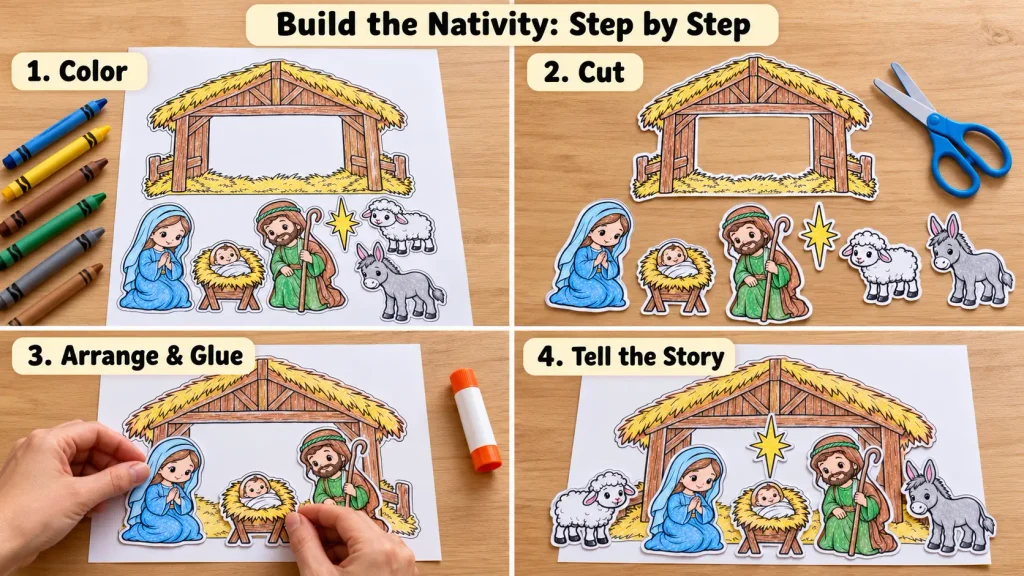
Build the Nativity gives children a printable nativity scene to arrange themselves. The page includes a stable background and separate pieces showing Mary, Joseph, baby Jesus, a star, a sheep, and a donkey.
The stable can remain on its paper as the base. Children do not need to construct a freestanding building.
This is one of the nativity crafts for kids that works especially well for naming characters and talking about where each piece belongs.
Supplies
- Activity page 1/10
- Crayons or colored pencils
- Scissors
- Glue
How to Make It
- Color the stable background and the separate pieces.
- Cut out the figures, animals, and star.
- Place the pieces on the stable scene before using glue.
- Move them around until the child is happy with the arrangement.
- Lift one piece at a time, add a small amount of glue, and press it into place.
- Leave the finished scene flat while it dries.
For preschoolers, cut out the pieces in advance. Let the child choose the arrangement and help apply the glue.
How to Use the Finished Scene
Read a short passage from Luke 2 in the King James Version, then invite children to point to the people and animals they recognize.
Try a simple prompt: “Can you show me where baby Jesus is?”
Display the finished printable nativity scene on a wall or noticeboard where children can return to it during the Christmas season.
2. Nativity Stick Puppets
These printable nativity puppets turn familiar characters into props children can hold and move.
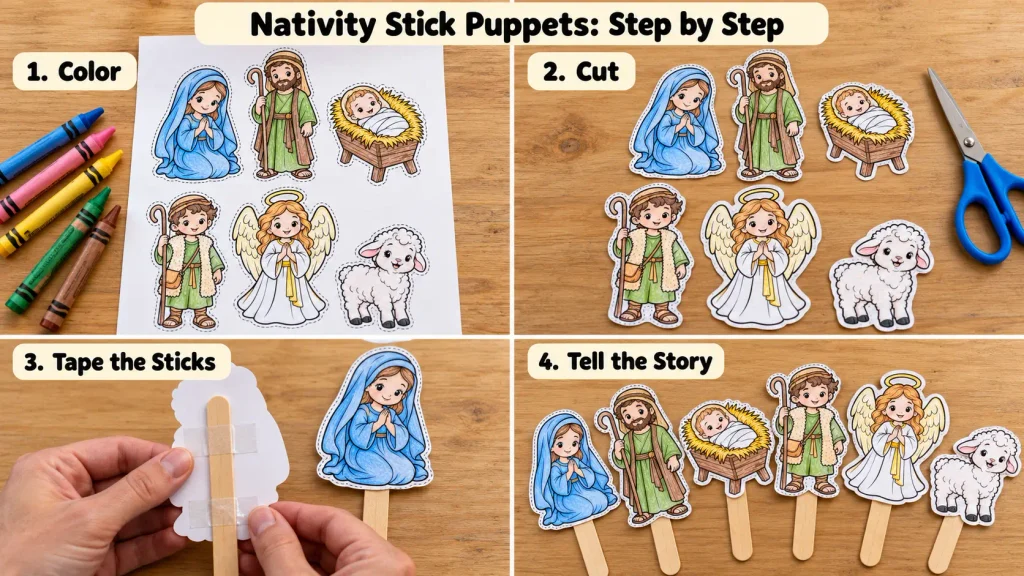
The page includes Mary, Joseph, baby Jesus in a manger, a shepherd, an angel, and a sheep. Craft sticks become handles behind the paper figures.
Among these nativity crafts for kids, the stick puppets are a useful choice for children who enjoy making up dialogue or demonstrating what happened.
Supplies
- Activity page 2/10
- Coloring supplies
- Scissors
- Six craft sticks, if making every puppet
- Tape
How to Make Them
- Color the characters while they are on the sheet.
- Cut around each figure.
- Turn one figure face down.
- Position a craft stick vertically against its back, leaving enough stick extending below the paper to make a handle.
- Secure the stick with tape across the back.
- Lift the puppet gently by its handle to check the attachment.
Repeat for the remaining characters. Younger children can choose the colors while an adult cuts and attaches the sticks.
How to Use the Puppets
Start with two or three characters. An adult can narrate a short part of the story while children lift the relevant puppets.
For example, use the angel, shepherd, and sheep when talking about the shepherds hearing the good news.
Encourage children to describe the story in their own words. If they invent dialogue, explain that they are imagining what the characters might have said.
3. Angel of Joy
Angel of Joy includes an angel body, separate wings, a halo, and small heart decorations.
Children color the pieces and attach the wings behind the body. The finished angel can become part of a Christmas display or a picture mounted on an extra sheet of paper.
These Christmas Bible crafts for kids can also create an opportunity to talk about the angels’ announcement in Luke 2.
Supplies
- Activity page 3/10
- Coloring supplies
- Scissors
- Glue
- Optional backing paper
How to Make It
- Color the angel, wings, halo, and hearts.
- Cut out the pieces, keeping the attachment tabs where shown.
- Place the wings behind the angel, with the illustrated sides facing forward.
- Glue the overlapping tabs behind the body.
- Position the halo above the head and attach its tab behind the angel.
- Add the hearts to a backing sheet around the angel, or keep them as separate decorations.
- Let the glued pieces dry flat.
For nativity crafts for preschoolers, an adult can prepare the small pieces so children can focus on placing and pressing them.
A Conversation to Try
Ask, “What good news did the angels bring?”
You can also invite children to describe the expression on their angel’s face or explain the colors they chose.
4. Follow the Star
Follow the Star combines a large Bethlehem star with three hanging medallions showing Mary, baby Jesus, and Joseph.
It adds a hanging decoration to your nativity crafts for kids and gives children practice identifying the three figures.
Supplies
- Activity page 4/10
- Coloring supplies
- Scissors
- Hole punch
- Short lengths of string
How to Make It
- Color the star and all three medallions.
- Cut around the outside edges, keeping the small tabs.
- Have an adult punch the marked attachment points.
- Use short pieces of string to connect the medallions to the lower attachment points on the star.
- Add a separate hanging loop through the top attachment point.
- Check the knots before displaying the craft.
An adult should handle the hole punching, string preparation, and hanging for younger children.
How to Use the Star
Invite children to name the people on the medallions.
If you also discuss the star and the wise men, read their account in Matthew 2 in the King James Version. Explain that this is a different part of the Christmas account from the shepherds’ visit in Luke 2.
5. Nativity Headband
The Nativity Headband has an illustrated front panel and two star-pattern extension strips.
Children can wear their finished work during a Christmas story session or take it home to show their family. It is the wearable option in this collection of nativity crafts for kids.
Supplies
- Activity page 5/10
- Coloring supplies
- Scissors
- Glue
- Optional tape to reinforce the joins
How to Make It
- Color the Nativity front panel and the two extension strips.
- Cut out all three pieces, keeping the joining tabs.
- Glue the extension strips to the sides of the front panel.
- Have an adult gently measure the band around the child’s head.
- Overlap the ends until the fit is comfortable.
- Remove the band and secure the final join.
- Allow the glue to dry before wearing.
Use only as much extension length as needed. The finished headband should slide on and off comfortably.
How to Use the Headband
Invite children to wear their headbands while sharing one detail they remember from the Christmas story.
A prompt such as “Tell me about the picture on your headband” gives each child a simple way to participate.
6. Baby Jesus in the Manger
This baby Jesus craft includes a separate baby, a manger with straw, a star, and two sheep.
The main assembly step is placing baby Jesus on the straw. To create a complete picture with the star and sheep, add an extra sheet of paper as a backing.
This is one of the nativity crafts for kids that suits a quieter session with just a few assembly steps.
Supplies
- Activity page 6/10
- Coloring supplies
- Scissors
- Glue
- Optional sheet of paper or cardstock for a complete scene
How to Make It
- Color the baby, manger, star, and sheep.
- Cut out the pieces.
- Position baby Jesus so he is resting on the straw.
- Glue the baby to the overlapping straw area.
- If using backing paper, glue the manger onto it.
- Arrange and glue the star above the manger and the sheep nearby.
- Leave the picture flat to dry.
Without backing paper, keep the star and sheep as separate pieces beside the assembled manger.
A Conversation to Try
Explain that a manger is a place where animals are fed, then talk about the detail in Luke 2 that Jesus was laid in one.
Ask, “What can you see around the manger in your picture?”
For younger children, naming the baby, star, and sheep is a useful starting point.
7. Nativity Story Wheel
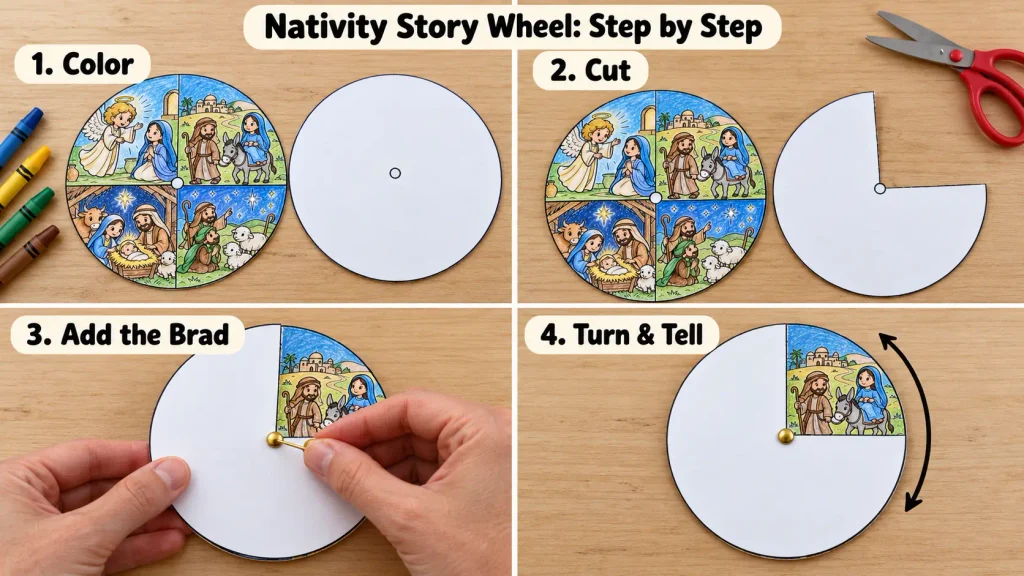
The nativity story wheel has an illustrated circle divided into four pictures and a separate cover with a marked viewing window.
A paper brad joins the centers so the pictures can move behind the window. This gives children a different way to revisit the story through nativity crafts for kids.
Supplies
- Activity page 7/10
- Coloring supplies
- Scissors
- One paper brad
How to Make It
- Color the four pictures on the illustrated circle.
- Cut out both circles.
- Have an adult remove the dotted quarter-circle window from the cover.
- Place the cover over the illustrated circle.
- Align the center marks.
- Have an adult make the center openings and insert the paper brad.
- Open the brad’s prongs on the back, leaving enough room for the paper to turn.
- Test the wheel to make sure each picture appears through the window.
Keep the two circles separate apart from the center fastener; gluing their surfaces together would stop the wheel turning.
How to Use the Wheel
Turn to one picture and ask, “Who can you see?” or “What is happening here?”
Help children find a sensible storytelling order rather than assuming the pictures must be discussed in whichever direction they turn the wheel.
An adult can guide the retelling while a younger child turns to the next scene.
8. Little Bethlehem Lantern
Little Bethlehem Lantern is a paper decoration made from four connected illustrated panels.
The template includes an end glue tab and a separate handle strip. The main body forms an open-top, open-bottom shape that can stand on a table.
For these nativity crafts for kids, you can keep the lantern as a simple standing decoration and leave the handle strip aside.
Supplies
- Activity page 8/10
- Coloring supplies
- Scissors
- Glue
How to Make It
- Color the four illustrated panels while the template is flat.
- Cut around the outside of the connected panel strip, keeping the end tab attached.
- Fold along the vertical boundaries between the panels.
- Fold the end tab inward.
- Apply a small amount of glue to the tab.
- Bring the ends together and attach the tab inside the opposite edge.
- Hold the join briefly, then let it dry.
Keep the illustrated panels connected during cutting. The finished body should have four sides.
How to Use the Lantern
Place it on a table and invite children to describe each side.
It works as an unlit Christmas decoration. Never put a real candle or flame inside this paper craft. If an adult chooses to add a light, use only an LED tealight with a secure battery compartment.
9. Nativity Finger Puppets
The finger puppet page includes Mary, Joseph, baby Jesus, an angel, and a shepherd holding a lamb.
Each character has attached side bands that curve behind the picture to form a ring. These nativity crafts for kids are ready for storytelling as soon as the taped bands are secure.
Supplies
- Activity page 9/10
- Coloring supplies
- Scissors
- Tape
How to Make Them
- Color each character.
- Cut around the character and its attached side bands as one piece.
- Curve the bands backward behind the picture.
- Overlap the ends to make a loose ring that fits a finger.
- Tape the overlapping ends together.
- Check that the puppet slides on and off easily.
Keep the bands attached to the characters. An adult can adjust the ring size and apply the tape for younger children.
How to Use the Puppets
Begin with two characters rather than putting every puppet on at once.
An adult might hold the angel while a child holds the shepherd. Retell a short moment together, then switch characters if the child wants another turn.
These Sunday school Christmas crafts also give quieter children a way to participate by moving a puppet while someone else narrates.
10. Christmas Story Garland
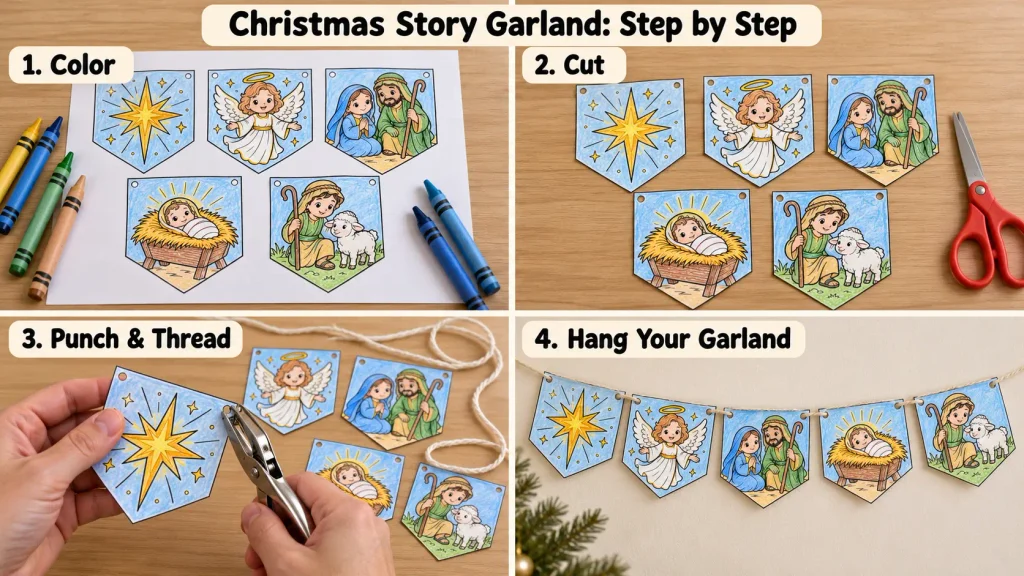
The Christmas Story Garland includes five pointed pennants showing a star, an angel, Mary and Joseph, baby Jesus in a manger, and a shepherd with a lamb.
It turns the children’s coloring into a shared display. Among these nativity crafts for kids, it is a practical choice when each child wants to contribute one piece to a group project.
Supplies
- Activity page 10/10
- Coloring supplies
- Scissors
- Hole punch
- String
How to Make It
- Color all five pennants.
- Cut around their outside edges.
- Have an adult punch the two marked holes at the top of each pennant.
- Thread string through both holes on each flag.
- Adjust the spacing so the pictures remain visible.
- Have an adult hang the finished garland securely, out of young children’s reach.
For a group display, children can color individual pennants and bring them together when everyone has finished.
How to Use the Garland
Invite each child to describe one picture before you hang it.
The pennants are display images rather than a required sequence of five events. Arrange them in a way that fits your space and use them as prompts for conversation.
Using Nativity Crafts for Kids at Home or Sunday School
A craft session can stay simple. You do not need to complete every project or prepare a long performance.
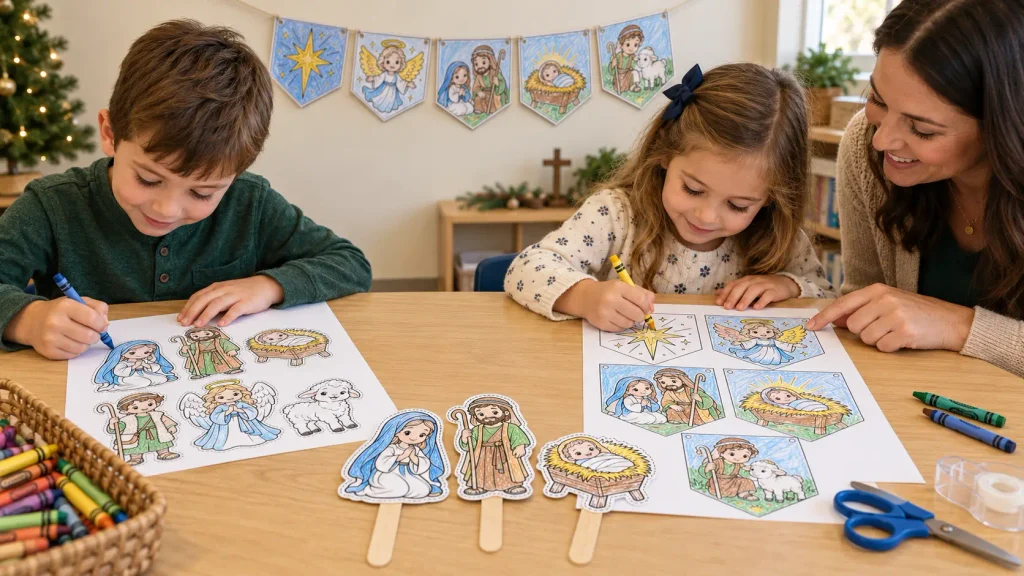
Try this routine:
- Read or explain a short part of the Christmas story.
- Show children the craft they will make.
- Demonstrate the main assembly step.
- Give children time to color and create.
- Invite them to share something about their finished work.
At home, one child may want to spend a long time coloring while another wants to begin assembling. Keep the pace flexible.
For Sunday school Christmas crafts, prepare a supply tray for each table. Keep each child’s cut pieces in a separate container and arrange adult help for the steps that require it.
Check the resource’s terms before sharing the digital file or distributing copies beyond its permitted use.
Adapting Nativity Crafts for Preschoolers
Younger children can take part without completing every step independently.
To adapt nativity crafts for preschoolers:
- Prepare detailed cuts before the session.
- Offer a small selection of coloring supplies.
- Show one assembly step at a time.
- Let children choose where pieces go.
- Help with tape, holes, string, and fasteners.
- Accept different color choices and imperfect arrangements.
A child who colors only Mary and the manger has still participated. You can save the remaining pieces for another day.
For additional practice with classroom tools and paper activities, explore these fine motor skills worksheets.
Planning Nativity Crafts for Kids During Advent
Spread the projects across December if you want an ongoing routine.
For example, begin with Build the Nativity, make puppets during another session, and finish with a garland for your Christmas display.
Use the children’s interests to guide your choices. If they keep returning to the puppets, give them another opportunity to tell the story instead of moving immediately to a different project.
For more ideas to organize the season, visit our guide to Christian Advent activities for kids.
These Christmas Bible crafts for kids can sit alongside reading, singing, and family traditions without requiring a new craft every day.
Frequently Asked Questions
Are These Nativity Craft Templates Free?
Yes. This collection is offered as a free download through the SmartPrint Kids listing on Teachers Pay Teachers. You may need to sign in to access the file.
What Paper Size Should I Use?
Use US Letter portrait paper, 8.5 × 11 inches. Check your print preview and make a test print before preparing multiple copies.
Which Nativity Crafts for Kids Are Easiest to Start With?
Build the Nativity and Baby Jesus in the Manger have straightforward coloring and gluing steps when an adult prepares the cut pieces.
Finger puppets are another option if an adult helps tape the bands.
Which Activities Need the Most Adult Help?
The story wheel needs an adult to prepare the window and center fastener. Follow the Star and the garland need hole punching and string. The lantern benefits from careful folding and help with its final join.
Do I Need to Make Every Craft?
No. Choose the activity that matches your supplies, available time, and children’s interests. Each project can be used on its own.
Can I Use the Crafts for Storytelling?
Yes. The scene, puppets, and wheel provide pictures children can point to or move while discussing the story.
When children invent dialogue, distinguish their imaginative storytelling from the wording of the Bible passage.
Choose Your First Christmas Craft
Start with one page, gather its supplies, and give children time to make it their own. A colored scene or a simple paper puppet can become something they return to throughout December.
Download the free Nativity crafts pack on Teachers Pay Teachers and choose the project that fits your next family afternoon or Sunday school session.