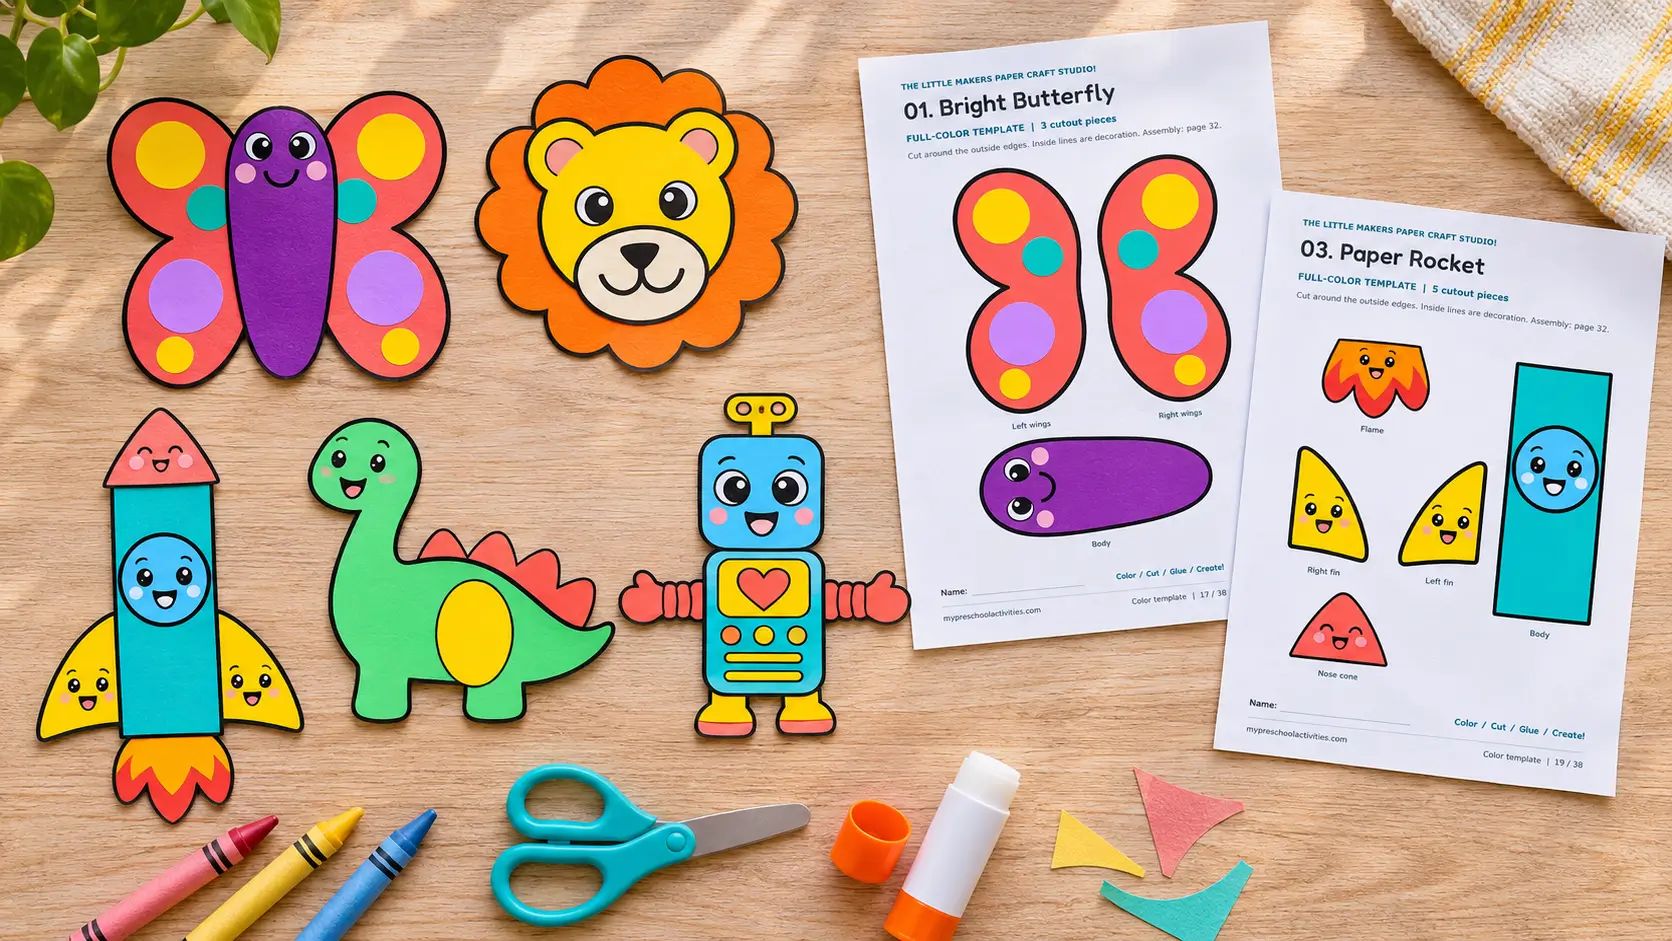
A butterfly with patterned wings, a rocket ready for a countdown, or a smiling robot can start with one printed sheet. These easy paper crafts for kids turn a few cutout pieces into colorful projects for a classroom table or an afternoon at home.
The free PDF includes 15 designs in both black-and-white and full-color versions. Children can color, cut, arrange, and glue, with adult help for curves and smaller pieces. Every project is a flat paper craft, so you can display it on a wall, add it to a picture, or keep it in a folder.
Below, you will find the exact pages to print, the pieces for each project, and practical assembly tips that match the download.
What Is Included in These Easy Paper Crafts for Kids?
The printable collection, The Little Makers Paper Craft Studio!, contains 38 US Letter pages:
- Page 1: Parent and teacher guide.
- Pages 2–16: Fifteen black-and-white craft templates.
- Pages 17–31: Fifteen matching full-color templates.
- Pages 32–36: Illustrated assembly instructions, with three projects per page.
- Pages 37–38: A gallery of finished examples.
Each craft uses one template sheet. Choose either the black-and-white version for coloring or the matching color version for cutting and assembling. You only need both if you want to make two copies of that craft.
The assembly instructions and finished gallery are on separate pages. There is no separate background template; mounting the finished craft on plain paper is optional.
Printable Craft Page Guide
Use these PDF page numbers to print a single project without printing the entire pack.
| Craft | Black-and-white template | Color template | Assembly instructions |
|---|---|---|---|
| Butterfly | 2 | 17 | 32 |
| Lion | 3 | 18 | 32 |
| Rocket | 4 | 19 | 32 |
| Flower | 5 | 20 | 33 |
| Elephant | 6 | 21 | 33 |
| House | 7 | 22 | 33 |
| Fish | 8 | 23 | 34 |
| Rainbow | 9 | 24 | 34 |
| Bee | 10 | 25 | 34 |
| Dinosaur | 11 | 26 | 35 |
| Ladybug | 12 | 27 | 35 |
| Teddy bear | 13 | 28 | 35 |
| Apple tree | 14 | 29 | 36 |
| Robot | 15 | 30 | 36 |
| Bird | 16 | 31 | 36 |
These are page numbers in the PDF, including the opening guide. For a black-and-white butterfly, for example, print page 2 and keep page 32 nearby for the assembly pictures.
Supplies and Printing Tips
Gather a small set of materials for these easy paper crafts for kids:
- Regular printer paper or light cardstock.
- Child-safe scissors that suit the child’s hand.
- A glue stick or a small amount of liquid glue.
- Crayons, colored pencils, or markers for the black-and-white templates.
- A tray or envelope for each child’s cut pieces.
- Optional blank paper or cardstock for mounting a finished craft.
Print on US Letter paper, 8.5 × 11 inches, at 100% or Actual Size. Check one sheet before preparing a class set. Regular paper is easier to bend and cut; light cardstock makes a sturdier craft but may need more adult help with cutting.
For a short activity, choose the color template. For a coloring and craft session, use the black-and-white version and let children decorate the pieces before cutting them out.
Print the selected template and its assembly page. You can keep one shared copy of the instructions at the table rather than giving every child an extra sheet.
How to Use the Printable Paper Craft Templates
Start by looking at the chosen project in the assembly instructions or gallery. Find the main pieces on the template, then follow this routine:
- Color before cutting. The uncut sheet gives children a larger surface to hold while they decorate.
- Cut around each outside outline. Printed details inside a piece stay in place. Eyes, patterns, and facial features are not separate cutouts unless they belong to a separate outlined piece.
- Keep the pieces together. Place them in a tray so smaller parts do not get mixed with scraps.
- Arrange everything without glue. Compare the layout with the assembly pictures. Notice which parts go behind and which sit on top.
- Glue in the illustrated order. Some pieces need to attach behind a body or head. The largest piece does not always go first.
- Use small overlaps and a little glue. Press the joining areas gently, then let the craft dry flat.
The parts join to one another to make a flat craft. If children want a scene, they can mount the completed project on a separate sheet afterward.
15 Easy Paper Crafts for Kids to Make
The projects below follow the pieces and assembly instructions in the PDF. Each includes an optional idea for play, conversation, or display after the craft is complete.
1. Bright Butterfly
Print: Page 2 or 17. Assembly: Page 32. Pieces: Three.
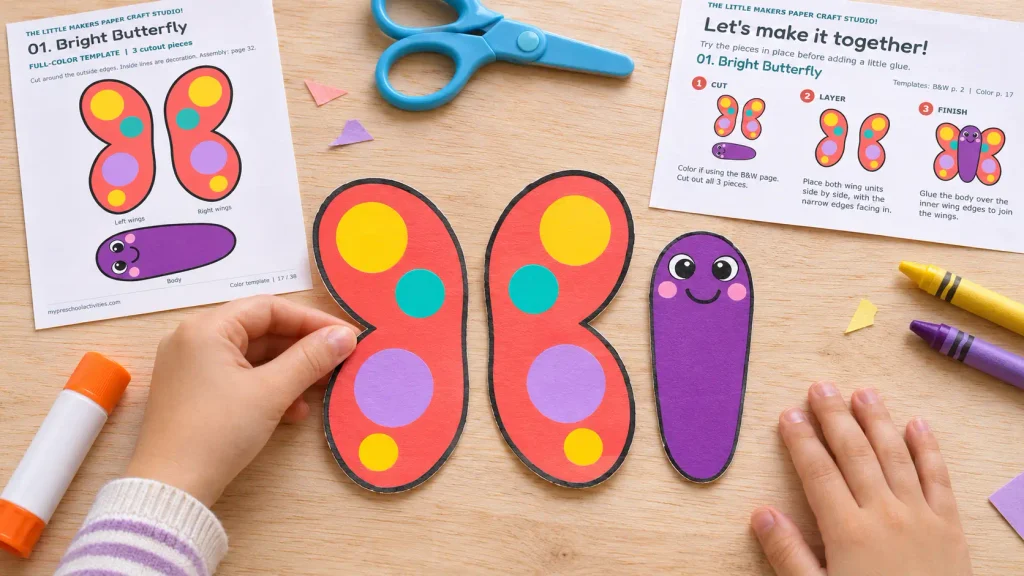
Cut out the two wing units and the butterfly’s body. Place the wings side by side with their narrow edges facing the middle. Glue the body over those inner edges to connect the wings.
Keep the outer wing edges free so their shapes remain visible. Children using the black-and-white template can choose matching patterns or make each side different.
Try next: Ask children to find a shape or pattern that appears on both wings. Place the butterfly beside the flower craft to make a garden picture.
2. Friendly Lion
Print: Page 3 or 18. Assembly: Page 32. Pieces: Three.
The lion has a scalloped mane, a face, and a muzzle. Start by centering the face on the mane. Check that the mane shows around the face, then glue the muzzle below the eyes.
The printed eyes and ears should remain visible. An adult can help turn the paper around the mane’s curved edge while the child works on a simpler part.
Try next: Invite children to give the lion a name and dictate a sentence for a classroom animal display.
3. Paper Rocket
Print: Page 4 or 19. Assembly: Page 32. Pieces: Five.
Cut out the rocket body, nose cone, two fins, and flame. Position a fin behind each lower side of the body. Attach the nose cone at the top, then glue the flat top of the flame behind the body’s bottom edge.
Arrange all five pieces before gluing so children can see how the hidden overlaps connect them.
Try next: Draw stars on a separate dark background. Add the rocket and count backward together before an imaginary launch.
4. Smiling Flower
Print: Page 5 or 20. Assembly: Page 33. Pieces: Four.
The flower includes a petal piece, smiling center, stem with leaves, and pot. Position the stem behind the flower head and behind the top of the pot. Glue the smiling center over the middle of the petals.
The leaves are part of the stem piece, so they stay attached when cutting. Check the full arrangement before joining the parts.
Try next: Place several flowers together to create a paper garden. Children can describe the colors they chose or add a drawn garden path.
5. Cute Elephant
Print: Page 6 or 21. Assembly: Page 33. Pieces: Three.
Cut out the head with its attached trunk and the two ears. Place an ear behind each side of the head, leaving the inner-ear patches visible. Glue the head over the ears’ inner edges.
The trunk belongs to the head piece; it does not need to be cut off or attached separately. Leave it free when joining the ears.
Try next: Ask children to point to the trunk and ears, then invent a short greeting for their elephant.
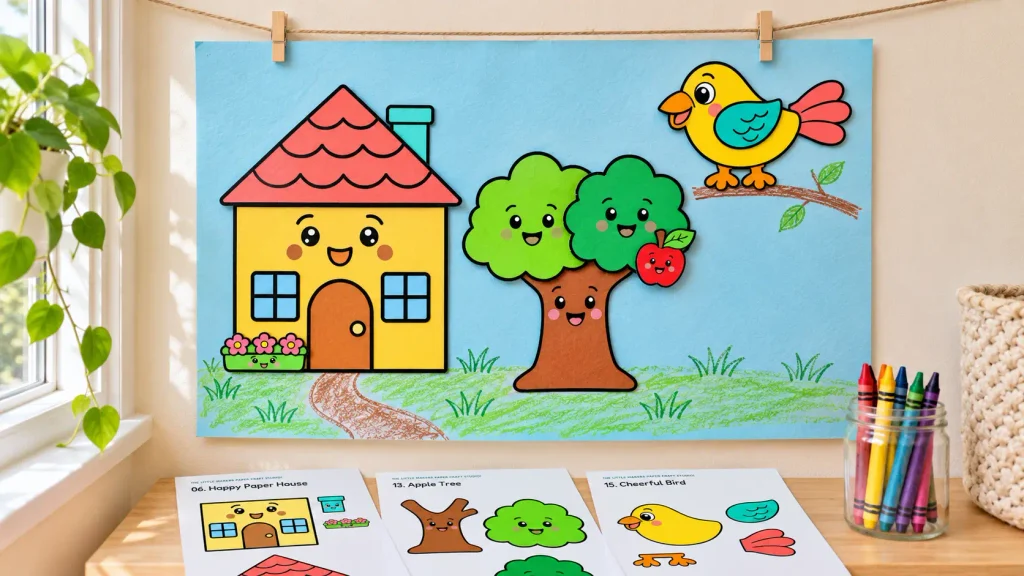
6. Happy Paper House
Print: Page 7 or 22. Assembly: Page 33. Pieces: Four.
Cut out the wall, roof, chimney, and flower box. Glue the chimney behind the roof before attaching the roof across the wall’s top edge.
Add the flower box at the lower left of the house, keeping the printed door clear. Windows and other details inside the wall piece remain part of that piece.
Try next: Mount several houses along a drawn road. Children can add trees, name their street, or describe who might live in an imaginary neighborhood.
7. Splashy Fish
Print: Page 8 or 23. Assembly: Page 34. Pieces: Four.
The fish has a body, tail, and two fins. Attach the narrow end of the tail behind the back of the body, opposite the eye. Glue one fin behind the top of the body and the other behind the bottom.
Check the fish’s direction before adding glue. Keep the eye visible and leave the outer ends of the fins and tail showing.
Try next: Draw water plants and bubbles on blank paper, then add the fish to complete an underwater scene.
8. Cloudy Rainbow
Print: Page 9 or 24. Assembly: Page 34. Pieces: Five.
Cut out three separate arches and two clouds. Each arch includes an open inner curve; an adult can help with this cut. Arrange the arches from largest to smallest and align their bottom ends.
Glue a cloud across each set of ends to hold the three bands together. This is a decorative three-band rainbow rather than a diagram of the full rainbow color sequence.
Try next: Count the three arches and two clouds. Ask which arch is largest, which is smallest, and how the pieces fit inside one another.
9. Busy Little Bee
Print: Page 10 or 25. Assembly: Page 34. Pieces: Three.
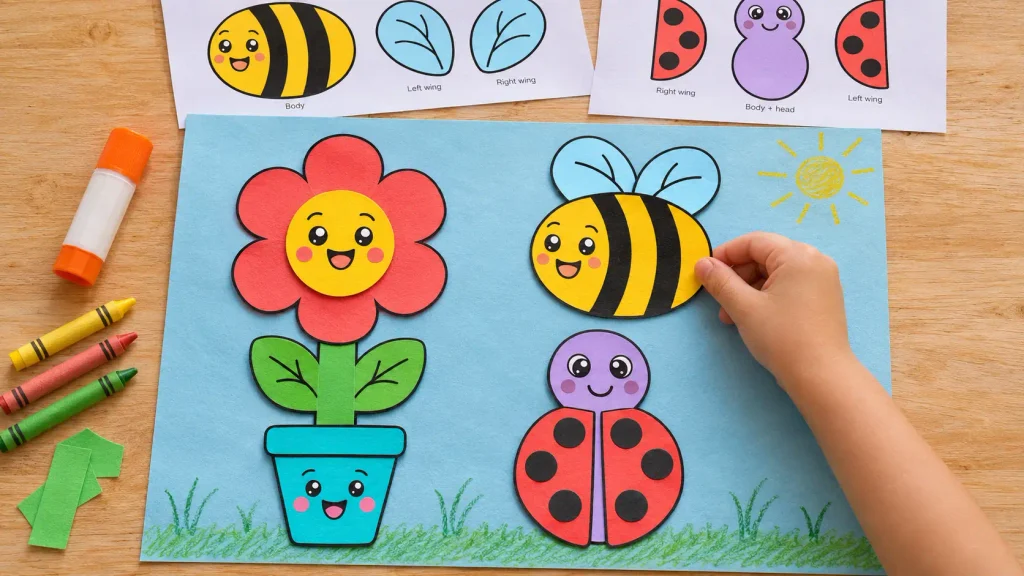
Cut out the bee’s body and two wings. Point the wing tips upward and overlap their lower ends behind the body. Glue the body across the wing bases to connect all three pieces.
The smiling face and stripes are printed details. Keep them intact while cutting around the outside shape.
Try next: Place the bee near a finished flower and invite children to tell a short garden story. The butterfly and ladybug can join the scene too.
10. Gentle Dinosaur
Print: Page 11 or 26. Assembly: Page 35. Pieces: Three.
The dinosaur includes a body, a joined strip of spikes, and a belly patch. Keep the spikes connected as one piece. Glue their joined base behind the rounded back so the pointed tips show above it.
Place the belly patch on the tummy, above the feet. Check that the patch does not cover the face or feet before pressing it down.
Try next: Children can invent a name for this cartoon dinosaur and draw an imaginary landscape around it.
11. Spotty Ladybug
Print: Page 12 or 27. Assembly: Page 35. Pieces: Three.
Cut out the body with its attached head and the two spotted wings. Position the wings on either side of the lower oval, with their straight edges facing inward.
Leave a narrow gap between the wings and keep the head visible. The spots are already printed: each wing has three, making six altogether.
Try next: Count one wing’s spots, then the other’s. Children can show how three spots and three more make six without needing to draw extra dots.
12. Teddy Bear
Print: Page 13 or 28. Assembly: Page 35. Pieces: Three.
Cut out the bear base, oval belly patch, and heart. Glue the patch onto the tummy, below the face and between the arms. Add the heart in the middle of the patch.
The bear’s head, arms, and legs stay connected as one base piece. Help children follow its outside outline without cutting through the printed interior details.
Try next: Invite children to name their bear and dictate a kind message beside it on a separate sheet.
13. Apple Tree
Print: Page 14 or 29. Assembly: Page 36. Pieces: Four.
Cut out the trunk, two leafy clusters, and one apple. Overlap the leafy clusters across the tops of the branches and glue them in position. Attach the apple to the leaves.
Keep the bottom of the trunk visible so the finished outline still reads as a tree. There is one separate apple cutout in this project.
Try next: Add a drawn garden or orchard background. If children draw more apples, count the added apples separately from the single printed cutout.
14. Friendly Robot
Print: Page 15 or 30. Assembly: Page 36. Pieces: Five.
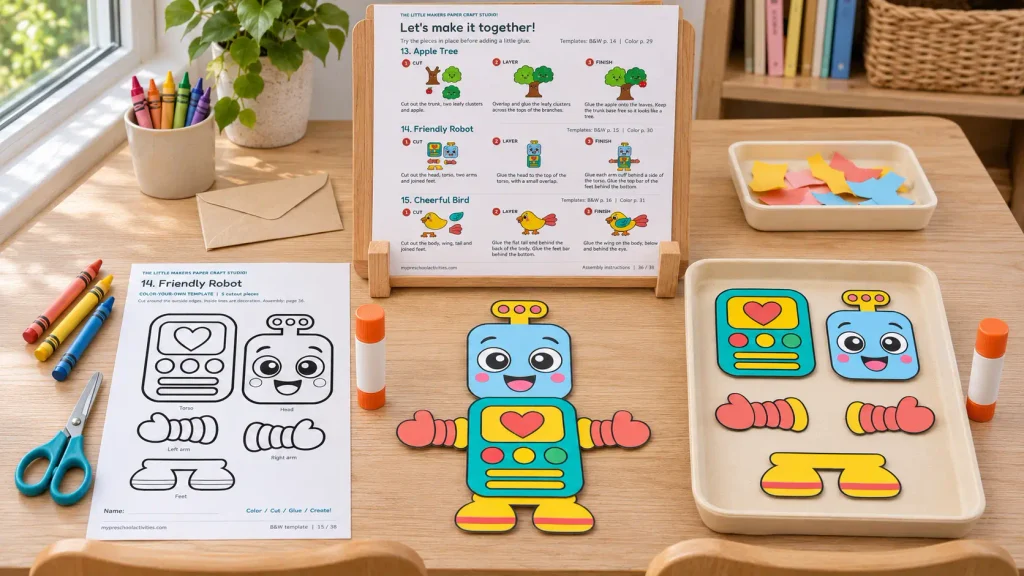
The robot has a head, torso, two arms, and one joined feet piece. Attach the head to the top of the torso with a small overlap. Glue each arm cuff behind a side of the torso.
Attach the top bar of the feet behind the body’s bottom edge. Keep the feet together as one piece rather than cutting them apart.
Try next: Ask children what job their robot would do. Add a dictated sentence, such as “My robot waters the flowers,” beneath the finished craft.
15. Cheerful Bird
Print: Page 16 or 31. Assembly: Page 36. Pieces: Four.
Cut out the bird’s body, wing, tail, and joined feet. Glue the flat end of the tail behind the back of the body. Attach the feet bar behind the bottom edge.
Place the wing on the body, below and behind the eye, so the face stays visible. Follow the assembly picture to check the tail and wing positions.
Try next: Draw a branch on a separate sheet and position the bird above it. Children can add leaves, a nest, or a speech bubble with an invented bird sound.
Choosing Paper Crafts for Preschoolers and Kindergarten
The piece count helps you prepare, but it does not tell the whole story. A three-piece lion still has a curved mane to cut, while the rainbow needs careful cutting around its open arches.
For children new to scissors, an adult can prepare some or all of the pieces. The child can choose colors, arrange the parts, and add glue. For children ready for more cutting, separate the template into smaller sections first so there is less paper to manage.
Kindergarten children may enjoy reading the picture sequence with a partner, explaining the order, or adding a sentence to the finished project. Offer support according to the task and the child’s current skills.
Cutting, drawing, and handling small materials are among the experiences discussed in the Department for Education’s guidance on fine motor skills. These paper crafts provide one practical way to include those actions in a creative activity.
For a separate selection of tracing, snipping, tearing, and arranging activities, explore our fine motor skills worksheets.
Setting Up a Small Craft Group
Choose one project for the first session and place its assembly page where everyone can see it. Set out one template, a tray, scissors, and glue for each child.
Show a single action before asking children to try it: cut one piece, arrange two parts, or add glue to an overlap. Keep an unglued example available so you can demonstrate which pieces fit behind others.
For mixed groups, prepare some pieces ahead of time and leave other templates uncut. Children can work on the same design with different levels of help.
Supervise scissors and glue, follow the supplies’ age and use instructions, and keep small pieces away from children who mouth objects. Collect scraps as you go so useful pieces stay separate from rubbish.
If a project needs a second session, store its pieces in a named envelope. There is no need to finish coloring, cutting, and assembly all at once.
Ways to Use the Finished Paper Crafts
Once dry, these easy paper crafts for kids can become part of a larger activity:
- Make a garden: Combine flowers, bees, butterflies, ladybugs, and the apple tree on a shared background.
- Build an imaginary neighborhood: Arrange houses along a drawn street and add trees or a visiting robot.
- Create a story scene: Choose two finished crafts and ask what happens when their characters meet.
- Add a writing strip: Invite children to write or dictate a name, label, or short sentence.
- Make a themed display: Group finished projects under headings such as Garden, Animals, or Space and Inventions.
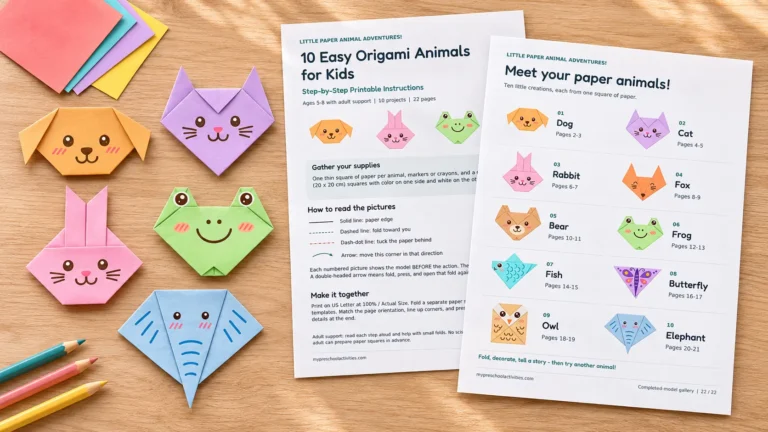
For a different kind of paper project, try our easy origami animals for kids. That guide uses folding instructions and separate paper squares, while this pack uses printed cutout pieces.
Frequently Asked Questions
Are these easy paper crafts for kids free?
Yes. The download is one free 38-page PDF containing all 15 projects, their black-and-white and color templates, assembly instructions, an adult guide, and a finished gallery.
Do I need to print all 38 pages?
No. Use the page guide to choose one template and its matching assembly page. Print both template versions only when you want two copies or want a color reference beside a black-and-white sheet.
Are the projects flat or three-dimensional?
All 15 are flat cut-and-paste crafts. The pieces connect with small glued overlaps. A separate blank background is optional, and no printed background sheet is included.
Should children color before or after cutting?
Color the black-and-white templates before cutting. Keeping the sheet intact gives children more paper to hold while decorating. The full-color templates can be cut and assembled without a coloring step.
Do we cut out the eyes, spots, and other small details?
Keep printed details inside each outlined piece. For example, the ladybug’s spots stay on its wings, and the elephant’s trunk stays attached to its head. Follow the piece labels and assembly pictures when checking what to cut.
Can younger children join in?
Yes, with suitable adult support. An adult can cut the pieces and help with positioning while the child chooses colors and joins in with arranging or gluing. Curves, rainbow openings, and smaller pieces may need extra help.
Download the Free Printable Paper Crafts
Choose a butterfly, rocket, robot, or another favorite from these easy paper crafts for kids. Print one template, keep its assembly pictures nearby, and begin by arranging the pieces together.
Find more printable projects and hands-on ideas in our Arts & Crafts collection.