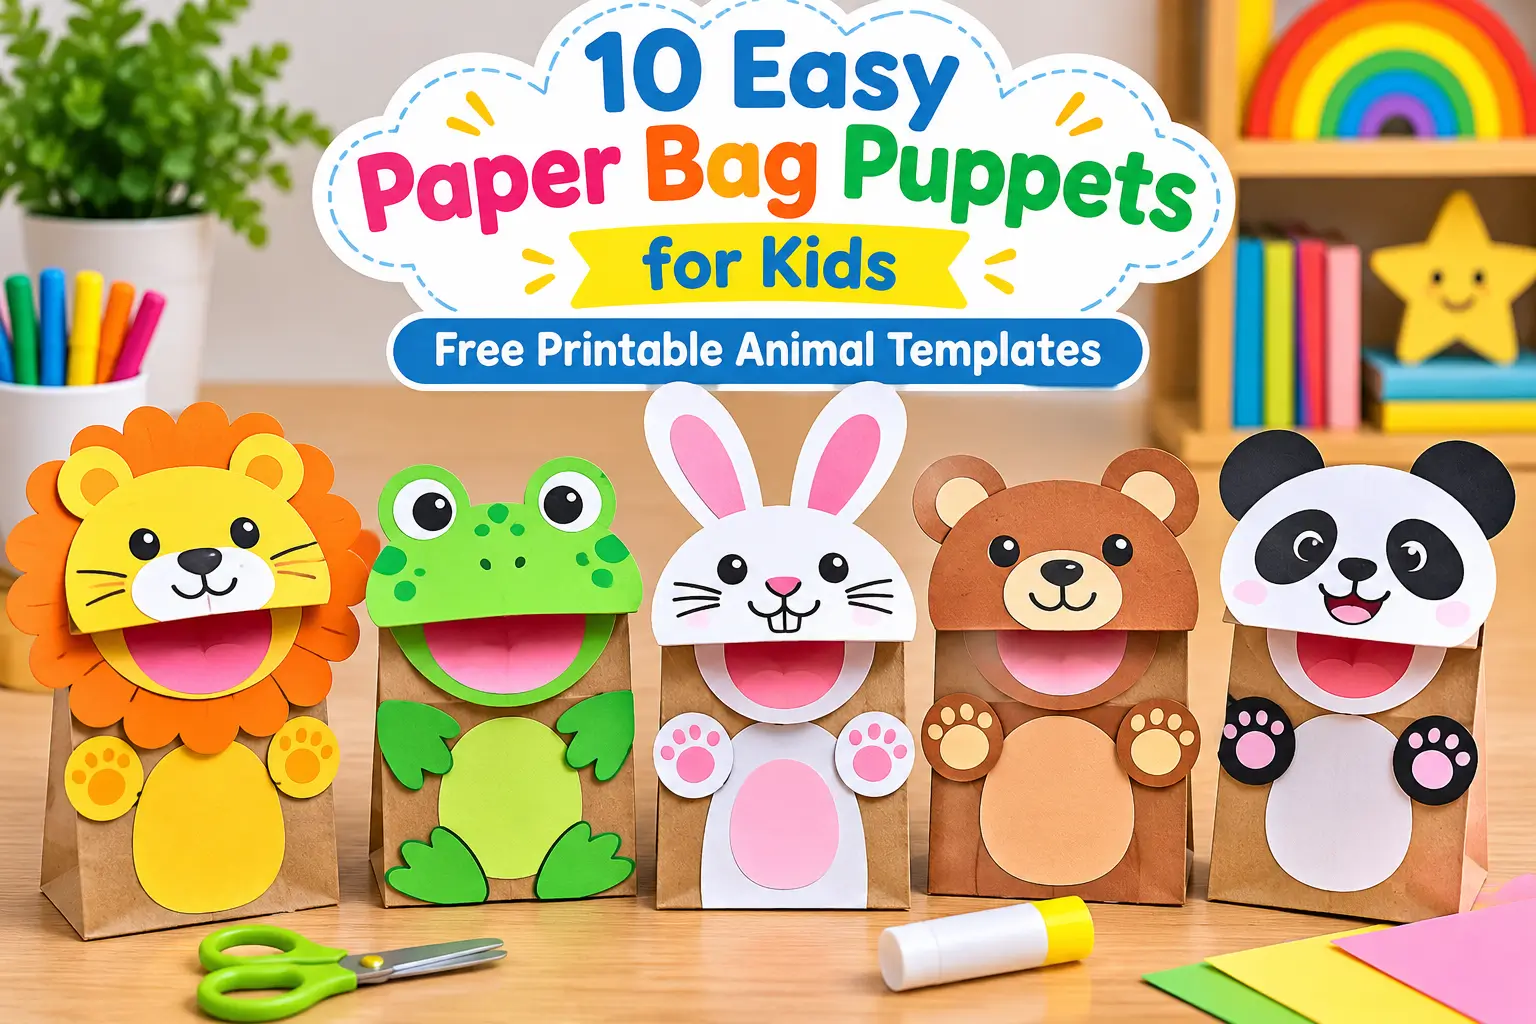
.Looking for easy paper bag puppets for kids that are fun to make and perfect for creative play? Turn ordinary brown paper lunch bags into adorable animal characters with our collection of 10 free printable puppet templates!
From a friendly lion and a cheerful frog to a cuddly panda and a playful monkey, these animal puppets are easy to prepare with everyday craft supplies. Children can color, cut, glue, and bring their favorite characters to life by moving the paper bag flap to make the puppet’s mouth open and close.
Our free 23-page printable PDF includes ten different animal designs, matching full-color and black-and-white templates, illustrated assembly instructions, and completed puppet examples.
These printable paper bag crafts are ideal for preschool, Pre-K, kindergarten, homeschool activities, classroom learning centers, and imaginative play at home.
Choose your favorite animal, gather a paper lunch bag, and get ready for a fun crafting adventure!
Why Paper Bag Puppets for Kids Are Great Learning Activities
Paper bag puppets combine hands-on crafting with storytelling and imaginative play.
Unlike some craft projects that end when the glue dries, puppets give children something they can continue using. A finished animal puppet becomes a character that can speak, ask questions, act out stories, and interact with other puppets.
Making paper bag puppets for kids also offers opportunities to practice several early childhood skills.
Fine Motor Skills
Cutting around animal shapes, arranging small pieces, and applying glue help children practice hand-eye coordination and controlled hand movements.
Younger preschoolers may need help with scissors, while older children can cut and assemble more pieces independently.
Language and Communication
Children can give their puppets names, invent conversations, and describe what their characters are doing.
A frog might ask the lion where it lives, or a monkey might invite the panda to play.
These simple conversations provide opportunities to practice vocabulary, speaking, listening, and taking turns.
Creativity and Imagination
Children can use their finished puppets to invent stories and explore different characters.
They might create a jungle adventure, an animal friendship story, or a funny puppet show.
Following Directions
Every printable animal contains seven labeled pieces.
Children can practice identifying the pieces, following assembly instructions, and completing a project in sequence.
The finished puppet gives them a playful reason to use those skills again.
What’s Included in the Free Paper Bag Puppet Templates?
Our printable collection is called “Meet the Little Animal Puppet Friends!”
The complete PDF includes 23 printable US Letter pages.
Inside the pack, you’ll find:
- 10 full-color animal puppet templates: Pages 3–12
- 10 matching black-and-white templates: Pages 13–22
- 2 illustrated teacher and parent instruction pages: Pages 1–2
- 1 completed puppet gallery: Page 23
Each animal comes with seven cutout pieces labeled A through G.
The labels help parents and teachers identify the face, body, inner mouth, ears, and additional parts needed for assembly.
All ten animals follow a similar construction process, making it easier to introduce the activity to a classroom group.
Meet the 10 Animal Puppet Friends
| Animal Puppet | Color Template | Black-and-White Template |
|---|---|---|
| Lion | Page 3 | Page 13 |
| Frog | Page 4 | Page 14 |
| Brown Bear | Page 5 | Page 15 |
| Bunny | Page 6 | Page 16 |
| Fox | Page 7 | Page 17 |
| Cat | Page 8 | Page 18 |
| Dog | Page 9 | Page 19 |
| Elephant | Page 10 | Page 20 |
| Panda | Page 11 | Page 21 |
| Monkey | Page 12 | Page 22 |
You don’t need to print the entire PDF for each child.
Simply choose one animal and print either its colored or black-and-white template.
Keep pages 1–2 available for the assembly instructions.
Materials Needed to Make Paper Bag Puppets for Kids
One of the best things about these printable animal puppets is that they require only a few inexpensive supplies.
Basic Craft Supplies
- Free printable animal puppet templates
- Small brown paper lunch bags
- White printer paper or light cardstock
- Child-safe scissors
- Glue sticks or child-safe school glue
- Crayons, markers, or colored pencils
- A ruler for checking the printed scale
Optional materials include small trays for organizing cutout pieces, a pencil for marking positions, and scrap paper for additional decorations.
Important: The PDF contains the printable puppet pieces, but the actual paper bags are not included.
You’ll need one paper lunch bag for each finished animal puppet.
What Size Paper Bag Should You Use?
The templates are designed for small paper lunch bags with a folded bottom flap.
The largest face template fits within approximately 4.6 inches wide by 2.55 inches tall, so choose a bag with a folded flap at least that size.
Paper bag dimensions may vary between brands.
Before printing enough templates for a classroom, print one test page and compare the face cutout with the folded flap of your actual bag.
If the face does not fit comfortably, try a different bag size.
Printing Instructions
For the best results:
- Open the free PDF in a PDF reader.
- Select US Letter paper (8.5 × 11 inches).
- Choose Actual Size or 100% in the print settings.
- Print your chosen animal template.
- Measure the one-inch print-check line with a ruler.
Avoid automatically selecting “Fit to Page,” which may change the printed dimensions.
You can use ordinary printer paper for easy cutting or light cardstock for sturdier puppet pieces.
How to Make Paper Bag Puppets for Kids Step by Step
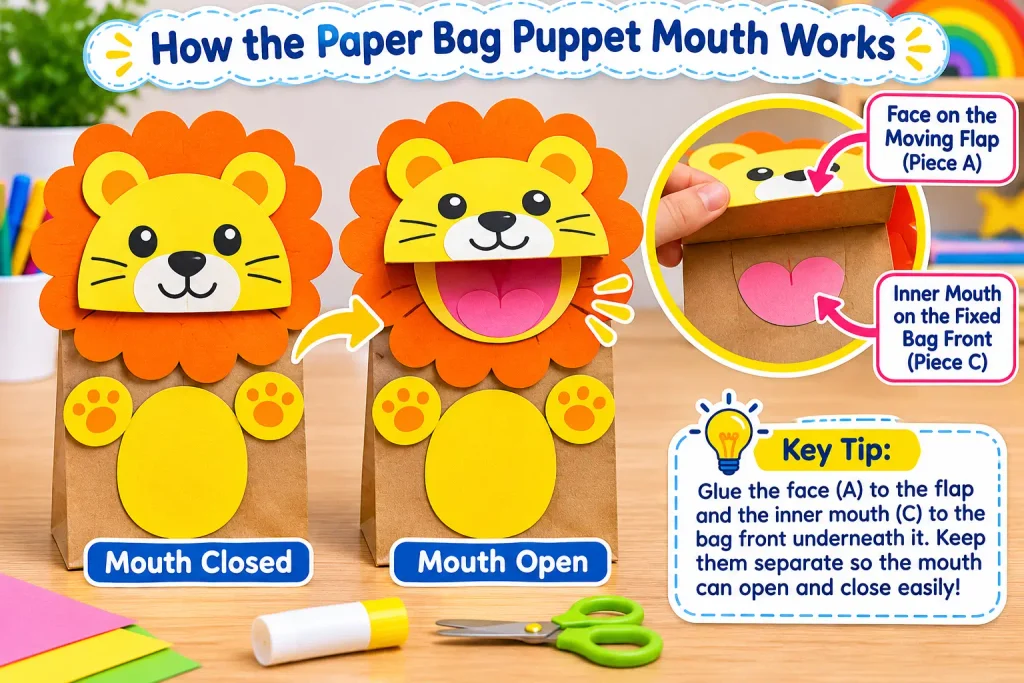
These easy paper bag puppets for kids use a folded paper bag flap to create a moving mouth.
The two illustrated instruction pages in the PDF explain how to attach the pieces correctly.
Follow the steps below to make your own talking animal puppet.
Step 1: Prepare the Paper Bag
Place your brown paper lunch bag flat on a table.
Position the bag so that its folded bottom flap is at the top and the open end faces downward.
The folded flap becomes the puppet’s movable upper mouth.
Gently lift and lower it to understand how the puppet will work.
Before adding glue, check that the flap moves freely.
Step 2: Choose and Print Your Animal
Select one of the ten animal designs.
Choose a full-color template if you want a quick cut-and-glue activity.
Choose the matching black-and-white template if children want to color their own animal.
Every animal includes seven labeled pieces:
- A: Face — attaches to the moving flap
- B: Body panel — attaches below the flap
- C: Inner mouth patch — attaches underneath the flap on the stationary bag front
- D and E: Ears or other animal-specific pieces
- F and G: Paws, hands, or feet
Most animals use D and E as ears.
The frog is an important exception because pieces D and E represent its back feet.
Step 3: Color and Cut Out the Pieces
If you’re using a black-and-white page, let children color the printed shapes before cutting.
Coloring the pieces while they are still attached to the sheet is often easier for little hands.
Carefully cut around the outside outline of each piece.
Keep the printed facial features and other decorative details intact.
Do not cut through the inside lines unless the specific instructions say otherwise.
Younger children may need help with curved shapes and smaller pieces.
Step 4: Attach the Face to the Moving Flap
Find piece A, the animal’s face.
For most animals, glue the ears (D and E) behind the face first.
For the frog, set pieces D and E aside because they will be attached to the lower bag.
Apply a thin layer of glue to the back of the face.
Place it on the moving paper bag flap, aligning the face’s straight lower edge with the flap’s lower edge.
Press gently.
Do not glue the moving flap to the stationary front of the bag.
The flap must remain free to move.
Step 5: Attach the Inner Mouth Patch
This step creates the talking puppet effect.
Find piece C, the inner mouth patch.
Lift the folded flap to reveal the stationary front surface of the paper bag underneath.
Glue piece C to that fixed surface, close to the lower edge of the flap.
Close the flap to check the position.
The inner mouth should remain hidden when the puppet is closed and become visible when the flap is lifted.
Keep glue away from the moving flap.
Step 6: Add the Body, Paws, and Other Pieces
Find piece B, the body panel.
Glue it to the front of the bag below the moving flap, leaving approximately 1/8 inch of space.
This prevents the body panel from interfering with the moving mouth.
Attach pieces F and G to the sides of the body.
For the frog, add pieces D and E as back feet at the lower corners of the bag.
Make sure no paper pieces overlap the moving flap’s lower edge.
Step 7: Let the Puppet Dry and Make It Talk
Allow the glue to dry before using the puppet.
Slide your hand through the open end of the paper bag.
Position your fingers under the folded flap and your thumb below it.
Gently raise and lower the flap.
The inner mouth patch should appear when the puppet opens its mouth and disappear when it closes.
Now give your animal puppet a name and a voice!
Your printable puppet is ready for storytelling, animal games, and imaginative adventures.
10 Easy Paper Bag Puppets for Kids to Make
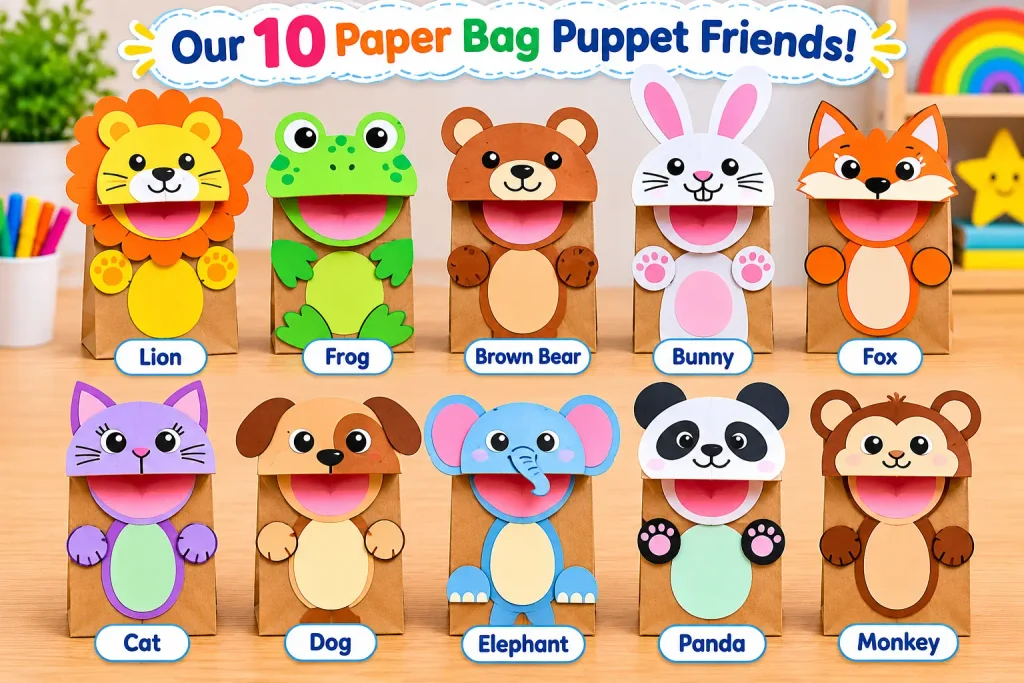
The printable pack includes ten animal characters, each with a colored and black-and-white version.
Every puppet uses seven cutout pieces and follows the illustrated assembly instructions on PDF pages 1–2.
Here is how to assemble each animal and extend the craft into an educational activity.
1. Lion Paper Bag Puppet
Color template: Page 3
Black-and-white template: Page 13
Cutout pieces: 7
This friendly lion features a cheerful face, a bright mane, rounded ears, and matching paws.
How to assemble:
- Glue the two ears (D and E) behind the lion’s face (A).
- Attach the face to the moving flap, add inner mouth piece C to the fixed bag front underneath, then glue the body (B) and paws (F and G) below the flap.
Learning activity: Animal Sounds and Confidence
Invite children to make their lion roar.
Try different voices, including a loud roar, a soft roar, and a friendly greeting.
You can also ask what the lion might say to help a nervous friend.
2. Frog Paper Bag Puppet
Color template: Page 4
Black-and-white template: Page 14
Cutout pieces: 7
This cheerful green frog has large eyes, a smiling face, small hands, and two back feet.
How to assemble:
- Attach face A to the moving flap and inner mouth C to the stationary bag front underneath.
- Glue body B below the flap, attach D and E as back feet at the lower corners, and position hands F and G at the sides.
Learning activity: Counting Frog Jumps
Let children make their frog jump across a table.
Count each jump aloud.
Try jumping three times, then five times.
For an extra challenge, ask children which number is larger or how many more jumps the frog needs to reach ten.
3. Brown Bear Paper Bag Puppet
Color template: Page 5
Black-and-white template: Page 15
Cutout pieces: 7
The brown bear puppet has rounded ears, a friendly face, and little paws.
How to assemble:
- Place ears D and E behind face A and glue the face to the moving flap.
- Glue inner mouth C beneath the flap on the fixed bag surface, then attach body B and paws F and G.
Learning activity: Woodland Animal Storytelling
Invite children to create a short story about a bear exploring the forest.
Ask simple questions:
Where does the bear live? What might it find? Who could it meet?
Encourage children to use their puppets to tell the story.
4. Bunny Paper Bag Puppet
Color template: Page 6
Black-and-white template: Page 16
Cutout pieces: 7
The bunny puppet features long ears, a sweet expression, and little paws.
How to assemble:
- Attach the two long ears (D and E) behind face A, then glue the face to the moving flap.
- Add inner mouth C to the fixed surface under the flap, followed by body B and paws F and G.
Learning activity: Bunny’s Vegetable Garden
Pretend that your bunny is visiting a vegetable garden.
Ask children to name vegetables and identify their colors.
You can also introduce position words such as inside, outside, behind, and next to.
5. Fox Paper Bag Puppet
Color template: Page 7
Black-and-white template: Page 17
Cutout pieces: 7
This orange fox has pointed ears, bright eyes, and a playful expression.
How to assemble:
- Glue ears D and E behind face A and attach the face to the moving flap.
- Place inner mouth C underneath on the fixed bag front, then attach body B and paws F and G.
Learning activity: Guess What I’m Thinking
Let the fox describe an object without naming it.
Other children listen to the clues and try to guess the answer.
For example, the fox might describe something round, red, and sweet.
This activity encourages descriptive vocabulary and listening skills.
6. Cat Paper Bag Puppet
Color template: Page 8
Black-and-white template: Page 18
Cutout pieces: 7
The cat puppet features pointed ears, whisker details, a smiling face, and small paws.
How to assemble:
- Attach ears D and E behind face A, then glue the face to the moving flap.
- Position inner mouth C underneath the flap and attach body B with paws F and G to the lower bag.
Learning activity: Practice Polite Conversations
Let the cat practice friendly phrases:
“May I play with you?”
“Can I have a turn?”
“Thank you!”
Another puppet can answer the cat’s questions.
This provides opportunities to practice listening, greetings, and taking turns.
7. Dog Paper Bag Puppet
Color template: Page 9
Black-and-white template: Page 19
Cutout pieces: 7
This friendly dog has floppy ears and a cheerful expression.
How to assemble:
- Glue ears D and E behind face A, then attach the face to the moving flap.
- Add inner mouth C to the fixed bag front underneath, followed by body B and paws F and G.
Learning activity: Classroom Helper Dog
Use the dog puppet to give simple instructions.
For example:
“Find something blue.”
“Count three pencils.”
“Say hello to your friend.”
Children can take turns giving directions through the puppet.
8. Elephant Paper Bag Puppet
Color template: Page 10
Black-and-white template: Page 20
Cutout pieces: 7
The elephant puppet includes large ears, a curved trunk, and small feet.
How to assemble:
- Attach ears D and E behind face A, keeping the trunk details visible, and glue the face to the moving flap.
- Glue inner mouth C to the stationary surface underneath, then add body B and feet F and G.
Learning activity: Big and Small
Let the elephant compare classroom objects.
Ask which objects are bigger, smaller, taller, or shorter.
Children can also create a pretend jungle adventure using the elephant and other animal puppets.
9. Panda Paper Bag Puppet
Color template: Page 11
Black-and-white template: Page 21
Cutout pieces: 7
The panda puppet features a black-and-white face, rounded ears, and matching paws.
How to assemble:
- Glue ears D and E behind face A, then attach the face to the moving flap.
- Position inner mouth C underneath on the fixed bag front, then add body B and paws F and G.
Learning activity: Colors and Patterns
Ask children to identify the panda’s colors.
Compare the panda with the brown bear puppet.
Discuss similarities and differences in their ears, facial features, and colors.
10. Monkey Paper Bag Puppet
Color template: Page 12
Black-and-white template: Page 22
Cutout pieces: 7
The monkey puppet includes round ears, a friendly smile, and little hands.
How to assemble:
- Attach ears D and E behind face A and glue the face to the moving flap.
- Position inner mouth C on the fixed surface underneath, then attach body B and hands F and G.
Learning activity: Monkey Says
Turn the finished monkey into a movement-game leader.
The monkey can give instructions such as:
“Clap your hands!”
“Touch your nose!”
“Jump two times!”
Children listen and follow the instructions.
This combines language, movement, and imaginative play.
Fun Learning Activities with Paper Bag Puppets for Kids
Once the puppets are finished, the creative fun doesn’t have to stop.
You can use the animal characters for storytelling, counting games, beginning sounds, and classroom role-play.
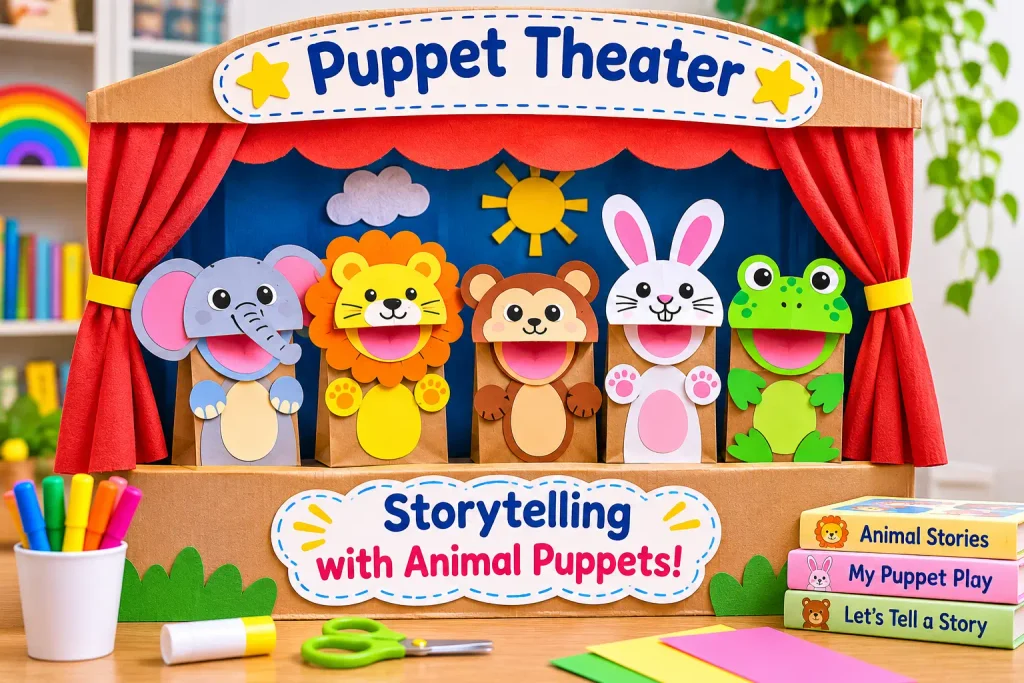
1. Create an Animal Puppet Theater
Make a simple puppet theater using a cardboard box or the edge of a classroom table.
Let children choose two or three puppets and create a short story.
For younger preschoolers, begin with a simple opening:
“One sunny morning, the little frog met a friendly lion…”
Ask children what happens next.
Encourage them to take turns using their puppets to continue the story.
According to the National Association for the Education of Young Children (NAEYC), dramatizing stories with simple props, including paper bag puppets, can create opportunities for children to practice language, remember story events, and participate in imaginative play.
The activity can be as simple as two characters greeting each other or as elaborate as a short classroom performance.
2. Practice Beginning Sounds
Use the animal puppets for early phonics activities.
Introduce an animal and emphasize the beginning sound of its name.
For example:
- Lion — /l/
- Bear — /b/
- Monkey — /m/
- Fox — /f/
- Panda — /p/
Invite children to name other words beginning with the same sound.
The puppet can repeat each word to make the activity more engaging.
3. Play an Animal Counting Game
Give each puppet a simple counting challenge.
The frog can jump five times.
The monkey can clap three times.
The elephant can take four slow steps.
Children count aloud as the puppets move.
You can also ask which puppet performed more or fewer movements.
4. Explore Animal Habitats
Use the puppets to introduce conversations about animal homes.
Ask children where frogs, lions, pandas, and elephants might live.
Provide pictures or books showing different habitats.
Let children match their puppets to the appropriate environments.
For older children, encourage short descriptions of each animal’s surroundings.
5. Practice Feelings and Friendship
Puppets can help children explore social situations.
Create a pretend scene where the bunny wants to join the lion’s game.
Ask what the bunny could say.
Or pretend that the panda feels sad and needs help from its friends.
Encourage children to explore possible responses through their puppets.
These activities offer opportunities to practice expressing emotions, listening, and using kind words.
Color or Black-and-White Paper Bag Puppet Templates?
Our paper bag puppets for kids come in two printable versions, making them suitable for different ages and classroom needs.
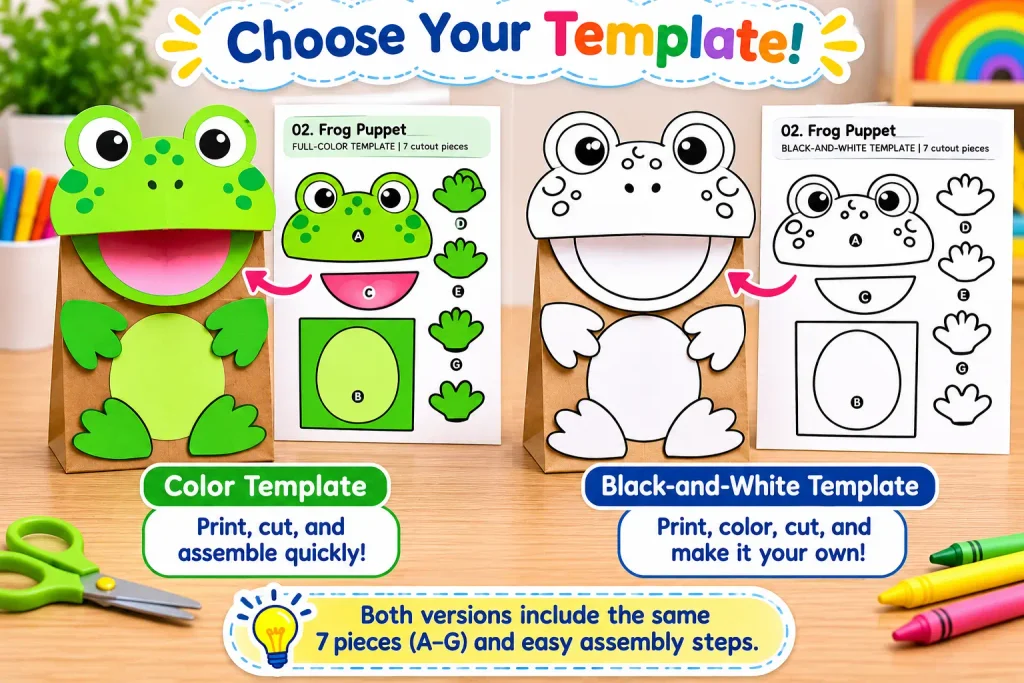
Full-Color Animal Templates
The full-color pages are ready to cut and assemble.
They’re a convenient option when:
- You want a quick craft activity.
- Children are still learning to use scissors.
- You need finished puppet examples.
- Coloring is not the main focus of the activity.
The colored templates are found on PDF pages 3–12.
Black-and-White Animal Templates
The black-and-white pages give children more creative freedom.
Children can color their animals using crayons, markers, or colored pencils.
They’re ideal when:
- You want an additional coloring activity.
- Children enjoy experimenting with colors.
- You want to reduce color printing.
- You’re planning a longer craft session.
The black-and-white templates are found on pages 13–22.
Teacher tip: Print one colored example as a reference and let children personalize the matching black-and-white puppet.
Both versions use the same seven labeled pieces for each animal.
How to Set Up a Paper Bag Puppet Craft Center
Making paper bag puppets for kids in a preschool classroom can be easier when the materials are organized before the activity begins.
Start by selecting one or two animals instead of offering all ten at once.
Prepare a craft table with paper bags, printable templates, child-safe scissors, glue sticks, and crayons.
Place the illustrated instructions nearby so adults can check the correct assembly order.
Organizing the Materials
Give each child a small tray or paper plate for collecting the seven pieces.
Keep the pieces for each animal together.
For younger children, prepare the smaller or more difficult cutouts in advance.
Older children can practice cutting their own pieces.
Working in Small Groups
A small-group setup gives adults more opportunities to help children place the face and inner mouth correctly.
Demonstrate how the folded flap moves before applying glue.
Encourage children to arrange their pieces without glue first.
This helps them understand the construction and reduces mistakes.
Using the Finished Puppets
After the glue dries, place the finished puppets in a classroom storytelling center.
Children can use them to retell familiar stories, create conversations, and invent new adventures.
For additional hand-coordination activities, explore our Fine Motor Skills Worksheets.
Common Paper Bag Puppet Problems and Easy Fixes
These printable puppet crafts are beginner-friendly, but a few assembly details are especially important.
The Puppet’s Mouth Won’t Open
Check whether the moving flap has accidentally been glued to the stationary bag front.
The face should move with the flap, while the inner mouth stays underneath on the fixed surface.
Keep the two parts separate.
The Inner Mouth Is Not Visible
Lift the flap and check the position of piece C.
It should sit beneath the closed flap and become visible when the flap is raised.
Adjust its position before the glue fully dries if necessary.
The Face Doesn’t Fit the Paper Bag
Compare the template with the folded flap of your bag.
The largest face requires a flap approximately 4.6 × 2.55 inches or larger.
Try a different paper lunch bag if the template is too large.
The Body Interferes with the Moving Mouth
Leave approximately 1/8 inch between the folded flap and the body panel.
Avoid gluing body pieces across the flap’s lower edge.
The Paper Wrinkles After Gluing
Use a small amount of glue.
Glue sticks are often easier for young children to control than liquid glue.
Allow the puppet to dry before testing the moving mouth.
Pieces Get Lost During Assembly
Keep each animal’s seven pieces together in a tray or envelope.
The A–G labels can help adults check which pieces belong to each part of the puppet.
Paper Bag Puppet Safety Tips
Adult supervision is important during cutting and gluing activities.
Use child-safe scissors appropriate for each child’s abilities.
Help younger children cut curved or small shapes.
Choose glue that is suitable for children’s crafts and follow the product instructions.
Avoid putting glue inside the paper bag or across the moving flap.
Keep small paper pieces away from children who may put objects in their mouths.
After completing the activity, collect loose scraps and store scissors safely.
The goal is to make the experience enjoyable, creative, and appropriate for each child’s skills.
More Free Printable Crafts for Preschoolers
If your children enjoy making animal paper bag puppets, they may also enjoy trying a seasonal variation.
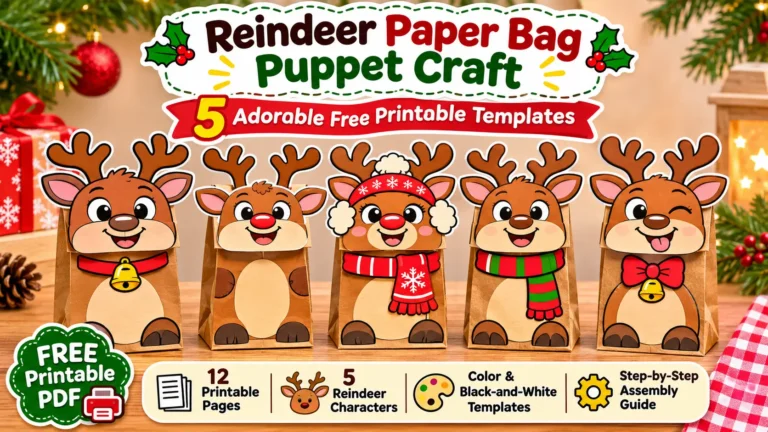
Our Reindeer Paper Bag Puppet Craft includes five different reindeer designs with colored and black-and-white templates.
It’s a fun option for Christmas storytelling, winter classroom activities, and holiday puppet shows.
You can also explore our Arts & Crafts collection for more free printable projects, cutting activities, and creative ideas for preschool and kindergarten.
Frequently Asked Questions About Paper Bag Puppets for Kids
Are these paper bag puppets for kids free?
Yes! The complete 23-page printable PDF is offered as a free download on My Preschool Activities.
It includes ten animal designs, matching colored and black-and-white templates, two instruction pages, and a gallery of completed puppets.
What animals are included in the printable?
The set includes a lion, frog, brown bear, bunny, fox, cat, dog, elephant, panda, and monkey.
Every animal has its own seven-piece template.
What age group are these crafts designed for?
These puppet crafts are especially suitable for preschool, Pre-K, and kindergarten children.
Younger children may need pre-cut pieces and assistance, while older children can complete more steps independently.
What size paper bag do I need?
Use a small paper lunch bag with a folded bottom flap.
The flap should be large enough for the face template, with the largest design fitting within approximately 4.6 × 2.55 inches.
Always test one template against your bag before printing several copies.
How do you make the paper bag puppet’s mouth move?
Attach the animal face to the folded flap.
Glue the inner mouth patch to the fixed bag front underneath the flap.
Keep the flap free of glue so it can open and close.
Do I need to print all 23 pages?
No.
Print only the animal and version you need.
The color templates are on pages 3–12, while the black-and-white versions are on pages 13–22.
Pages 1–2 provide assembly instructions.
Can children color their own puppets?
Yes!
Each animal includes a black-and-white version that children can decorate with crayons, markers, or colored pencils.
Can I use these puppets in my preschool classroom?
Yes. These activities are designed for preschool, kindergarten, homeschool, and family craft settings.
Teachers can print the selected templates for classroom activities, subject to the resource’s applicable usage terms.
Are the printable templates editable?
No.
The animal puppet templates are provided as ready-to-print PDF pages, not editable design files.
What can children do with their finished animal puppets?
Children can create puppet theaters, retell familiar stories, practice conversations, play counting games, explore beginning sounds, and invent animal adventures.
The puppets can become reusable characters in different classroom activities.