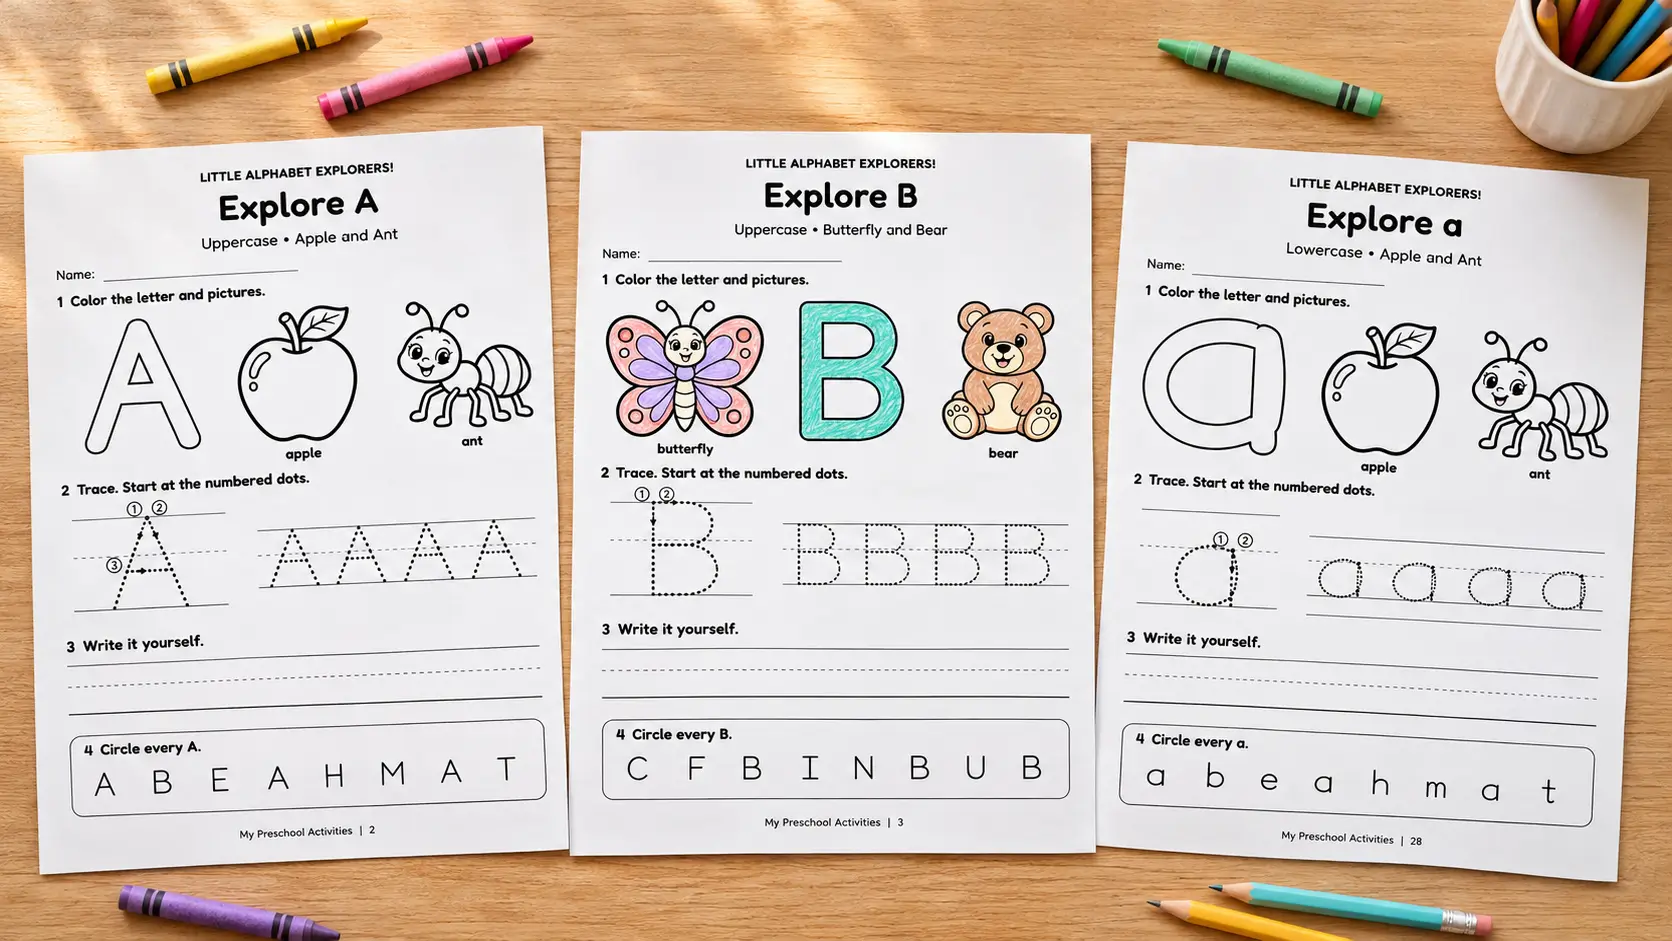
These free letter tracing worksheets give children a separate practice page for every uppercase and lowercase letter. Each worksheet combines an outlined letter to color, two labeled pictures, guided tracing, a writing line, and a letter-finding activity.
The Little Alphabet Explorers! PDF includes 52 worksheets in a 54-page file, with an adult guide at the beginning and a completed uppercase A example at the end. You can print the whole alphabet or choose individual letters using the page guide below.
Use these alphabet tracing worksheets for a short practice session at home, a small classroom group, or a writing center. Start with one letter and choose the parts that fit what your child is ready to try.
Download the Free Letter Tracing Worksheets PDF
The printable is designed for US Letter paper, 8.5 × 11 inches. The worksheet illustrations and letter models are black and white, with space for optional coloring.
Inside the file, you will find:
- Page 1: parent and teacher instructions.
- Pages 2–27: 26 uppercase letter tracing worksheets, A through Z.
- Pages 28–53: 26 lowercase letter tracing worksheets, a through z.
- Page 54: a completed uppercase A example.
The example page shows tracing, writing, and the letter-finding activity completed. It is a model for adults to preview, rather than an answer key for all 52 worksheets.
What Is on Each Letter Worksheet?
Every page follows the same four numbered sections. This lets you introduce the page once and return to a familiar layout with another letter.
1. Color the Letter and Pictures
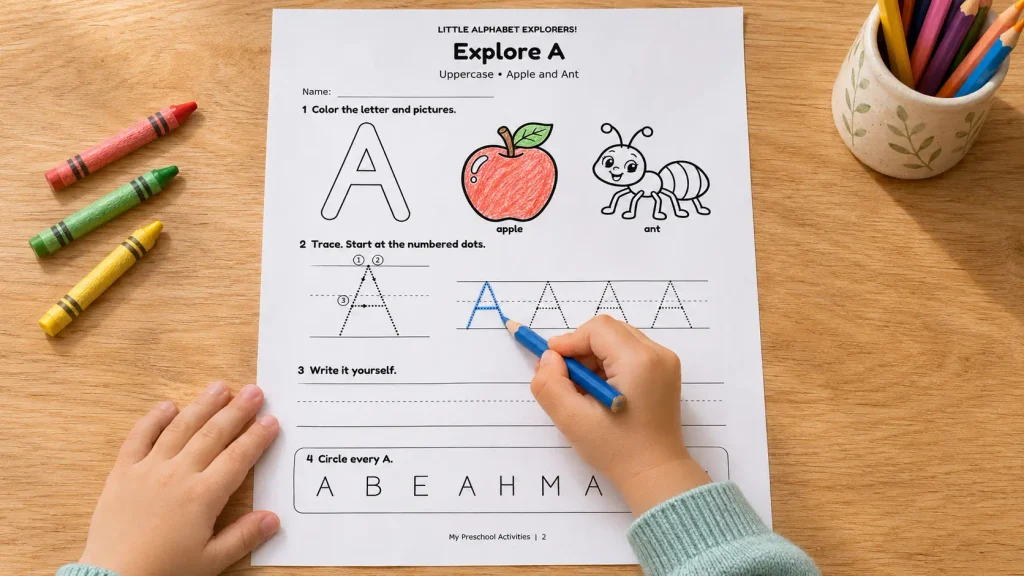
At the top, children see a large outlined letter and two pictures with word labels. The A page has an apple and an ant; the B page has a butterfly and a bear.
Say the letter name and name the pictures together. Coloring is optional. A child can choose one picture to color, decorate the letter, or move straight to tracing.
The word labels help adults identify the intended vocabulary. They do not mean children need to read every word independently before using the page.
2. Trace the Letter Models
The tracing section has a large dotted letter with numbered starting points and direction arrows. Beside it are four medium tracing letters on handwriting guides.
Follow the numbered strokes in order. Where a new number begins a separate stroke, lift the pencil before starting again. The arrows provide a consistent route for the manuscript style used in this workbook.
An adult can demonstrate the large model first, then invite the child to trace one of the medium letters. Completing all four is optional.
3. Try the Writing Line
The section labeled Write it yourself provides handwriting guides without dotted letters. Children can copy the model above or try forming the letter from memory when they are ready.
These are different tasks. Copying uses a visible example; writing from memory asks the child to recall the shape. There is no need to hide the model when a child still finds it useful.
4. Find and Circle the Target Letter
The final section asks children to circle every copy of the target letter in a row of mixed letters.
On the uppercase A page, for example, the row is A B E A H M A T. Children circle the three A letters. This activity checks letter recognition, not beginning sounds.
A child can point to the matching letters before circling them. This also offers a useful way to take part when they prefer looking and naming to pencil work.
A-Z Page Guide: Find the Letter You Need
Use this table to print individual letter tracing worksheets. The numbers refer to PDF pages, including the instruction page at the beginning.
| Letter | Uppercase page | Lowercase page | Picture words |
|---|---|---|---|
| A / a | 2 | 28 | Apple and ant |
| B / b | 3 | 29 | Butterfly and bear |
| C / c | 4 | 30 | Cat and car |
| D / d | 5 | 31 | Dog and duck |
| E / e | 6 | 32 | Elephant and egg |
| F / f | 7 | 33 | Fish and frog |
| G / g | 8 | 34 | Goat and grapes |
| H / h | 9 | 35 | Hat and horse |
| I / i | 10 | 36 | Igloo and insect |
| J / j | 11 | 37 | Jellyfish and jet |
| K / k | 12 | 38 | Kite and kangaroo |
| L / l | 13 | 39 | Lion and lamp |
| M / m | 14 | 40 | Monkey and moon |
| N / n | 15 | 41 | Nest and net |
| O / o | 16 | 42 | Octopus and ox |
| P / p | 17 | 43 | Pig and pear |
| Q / q | 18 | 44 | Queen and quilt |
| R / r | 19 | 45 | Rabbit and rainbow |
| S / s | 20 | 46 | Sun and sock |
| T / t | 21 | 47 | Tiger and turtle |
| U / u | 22 | 48 | Umbrella and unicorn |
| V / v | 23 | 49 | Violin and van |
| W / w | 24 | 50 | Whale and watermelon |
| X / x | 25 | 51 | X-ray and xylophone |
| Y / y | 26 | 52 | Yo-yo and yak |
| Z / z | 27 | 53 | Zebra and zipper |
You do not need to work through the alphabet in order. Choose a familiar letter, a classroom focus letter, or a letter from the child’s name.
For instance, a child named Mia could use M on page 14, i on page 36, and a on page 28. These are separate letter pages, not a personalized name-tracing sheet. For activities that bring the letters together, see our name tracing for preschoolers guide.
How to Use Letter Tracing Worksheets: A Five-Step Routine
You need a printed page, a pencil or crayon, and a clear place to work. Sit beside the child so you can show the letter’s movement in the same direction they see it.
Step 1: Look and Name
Point to the large outlined letter and say its name. Look at the pictures and read their labels aloud.
For uppercase A, you might say, “This is A. Here are an apple and an ant.” Ask the child to find another A on the page before moving on.
Step 2: Try the Movement Without a Pencil
Use a finger to follow the large dotted model. You can also make the letter in the air while looking at the page.
For the uppercase A model, follow one diagonal down, lift and follow the other diagonal, then add the crossbar. Keep the explanation matched to the numbered arrows rather than asking the child to invent a route.
Step 3: Trace One Model
Offer a comfortable writing tool and invite the child to trace the large letter or one medium example. Point out the starting number if needed.
Talk about the action: “Start here and follow this line.” If the child needs another demonstration, use a spare copy or separate paper so you leave their tracing space available.
Step 4: Copy on the Writing Line
Invite the child to try a letter on the blank guides. Keep the model visible. One attempt is enough to begin with, and they can add more if they want.
Notice a specific feature together, such as a curve, a crossbar, or where the letter meets the baseline. Use the visible model for comparison rather than expecting an exact match.
Step 5: Finish with the Letter Hunt
Read the final instruction and search the mixed-letter row. Children can point to each match, circle it, or name it aloud.
This gives the session a clear finish without requiring a full row of handwriting. The same routine works with the other letter tracing worksheets, but you can skip a step when another task is a better fit.
Uppercase and Lowercase Letter Tracing: Notice the Differences
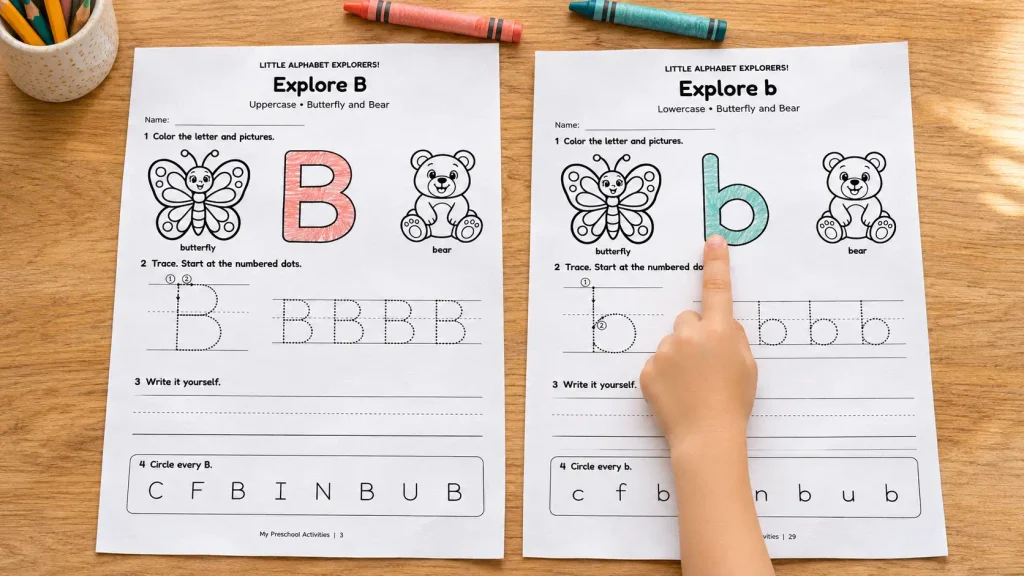
The uppercase and lowercase sets are separate, so you can print either form or compare a pair. For example, pages 3 and 29 show B and b with the same butterfly and bear pictures.
Point out how the forms differ. Uppercase B has two rounded parts, while lowercase b has a tall stem and one rounded part. Finding both forms on separate pages is a matching activity; tracing each one adds a writing task.
Single-Storey a and g
These letter formation worksheets use single-storey a and g. Children may see different forms in storybooks, printed signs, or other handwriting resources.
Before introducing a page, compare its model with the handwriting style used in your child’s classroom. Keep your demonstrations consistent with the model you choose for that session.
Handwriting Guides and Descenders
The guides include a top line, dashed middle line, baseline, and lower guide. They help show differences between tall letters, shorter letters, and letters with parts below the baseline.
In this lowercase style, g, j, p, q, and y extend below the baseline. The workbook also directs children to add the dots on i and j after forming the main stroke.
Try comparing b on page 29 with p on page 43. Look at which part reaches upward and which part goes below the baseline before tracing.
Picture Words Are Not a Complete Phonics Lesson
The pictures connect printed letters with words, but they do not all demonstrate one shared beginning sound.
For example, umbrella and unicorn both begin with the written letter U, but their first sounds differ. On the X pages, x-ray begins with the letter name, while xylophone begins with /z/.
Name the pictures accurately and use them to talk about the letters in the words. Keep the final circle-the-letter activity focused on matching letter shapes. Do not ask children to treat all the picture pairs as examples of one identical sound.
Letter tracing worksheets provide practice with letter shapes and formation. Pair them with conversation, stories, alphabet games, and opportunities to use writing for a purpose.
Preschool Handwriting Practice Beyond the Page
Give a practiced letter a small job. After tracing A, a child might add it to an adult-prepared name card or make a label for a drawing with help.
NAEYC’s article on preschoolers’ emergent writing describes writing as more than forming letters, including using marks and words to communicate ideas. A worksheet can sit alongside those meaningful writing experiences. NAEYC
Here are three optional ways to extend preschool handwriting practice:
- Build the shape with play dough. Compare straight and curved parts with the printed model, then put the dough aside before writing.
- Draw a picture and add a letter. A child might draw a cat and copy C beside it with adult help.
- Make a small message. Invite the child to add their first initial to a card or drawing for someone they know.

For practice with lines and shapes before or between letters, explore our fine motor skills worksheets. They include different tracing and creative tasks rather than more alphabet pages.
Using Letter Tracing Worksheets for Kindergarten and Preschool
At home, print a few selected pages and keep them in a folder. Offer one page at a time and decide together whether to begin with coloring, tracing, or finding the target letter.
In a classroom, letter tracing worksheets for kindergarten can support a teacher-led writing group or an alphabet center. Demonstrate the numbered strokes before expecting children to use them independently.
For a child who prefers a simpler task, cover the lower sections temporarily and focus on the large model. For a child ready to extend the activity, compare uppercase and lowercase pages or copy a picture word with help.
There is no need for every child to complete the same number of letters. Choose a specific task, such as tracing one model or finding the three target letters, and use that as the session’s goal.
Printing and Reusing Your Alphabet Tracing Worksheets
Start with US Letter at 100% or Actual Size and check the preview. Make sure the word labels, arrows, lower guides, and final activity are inside the printable area.
If an edge is clipped, choose a fit-to-printable-area setting and test one page. For A4 paper, check the preview before printing a group of pages.
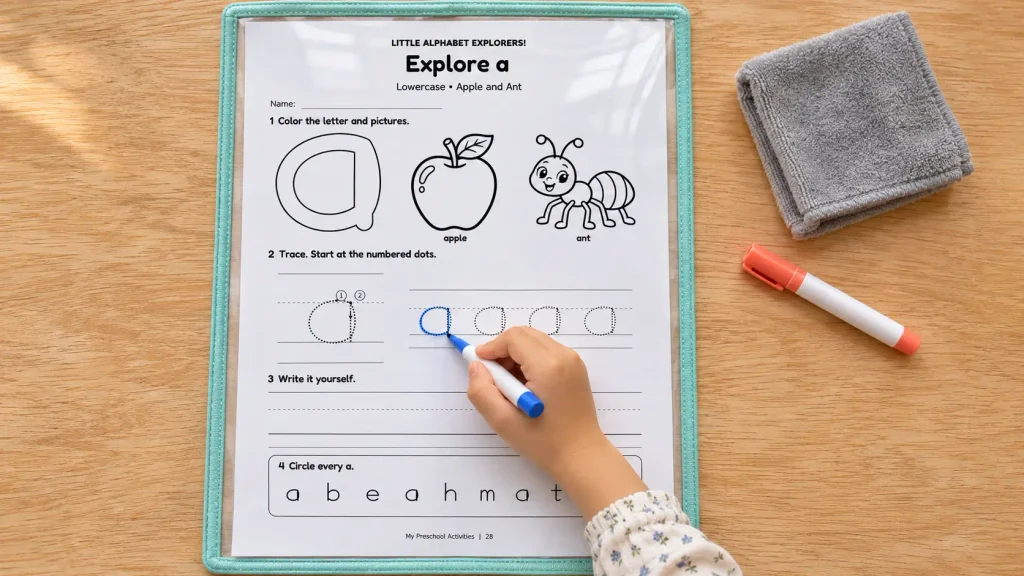
Regular white printer paper works for pencil and crayon practice. A clear reusable sleeve is an optional choice for dry-erase tracing. Keep a separate paper copy if the child wants to color with crayons.
To organize the letter tracing worksheets, store uppercase and lowercase pages separately or file matching pairs together. Keep page 1 with the adult materials and page 54 available as a reference.
Frequently Asked Questions
How many free letter tracing worksheets are included?
There are 52 worksheets: 26 uppercase pages and 26 lowercase pages. The complete PDF has 54 pages because it also includes an instruction page and one completed example.
Do the pages include both uppercase and lowercase letters?
Yes. Uppercase A–Z is on pages 2–27, and lowercase a–z is on pages 28–53. Each form has its own full page.
Are these dotted letter tracing worksheets?
Yes. Each worksheet has a large dotted model with numbered starting points and arrows, plus four medium tracing letters. There is also a writing line without dotted letter models.
Does the final activity teach beginning sounds?
The final activity asks children to find and circle the target letter among other letters. It is a letter-recognition task. The labeled pictures provide vocabulary examples, with sound differences explained in the adult guide.
Can a child copy the model on the writing line?
Yes. The model stays visible above the writing section. Copying is an appropriate way to use that space; children can try writing from memory as a separate task when ready.
Is there an answer key for every page?
No. Page 54 is a completed uppercase A example. It shows the tracing and writing sections completed and the three matching A letters circled. It is not a full answer key for the alphabet.
Which handwriting style does the PDF use?
It uses a manuscript style with single-storey lowercase a and g. The guide explains the lowercase descenders and how to follow the numbered strokes. Compare the models with your classroom’s preferred style before use.
Can I print only one letter?
Yes. Use the A–Z page table to select the exact PDF page. You can print an uppercase letter, its lowercase partner, or a small selection without printing the entire workbook.
Choose Your First Letter to Explore
Download the letter tracing worksheets and choose one letter from the page guide. Name it, look at the pictures, follow a model, and try the letter hunt. Add the writing line when it fits the child’s current practice.